FX stack keyframes
It is possible to set the Transparency setting of our Fade effect to 0% for the first image of our Layer, then to 100% for the last. TVPaint Animation will automatically calculate the effect's values to be applied on the intermediate frames. This is what we refer to as working with FX Stack Keyframes (also referred to as "keyframes" for short). Once this concept is understood, you will no longer work frame by frame.
Proceed this way for our current Project:
-
Go to the first image of the "Palette" Layer. Set the effect to 0% then click on the Key button from the FX Stack:

-
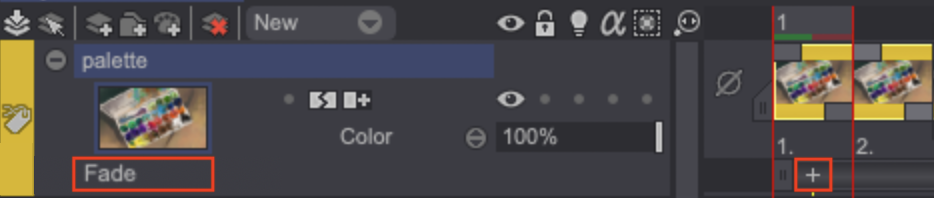
A cross
 symbol appears in the Timeline under our Layer's first image:
The name of the effect Fade effect is also written in the Layer Stack, under our Layer's thumbnail:
- The Fade effect is now set to a value of 0% for the first frame of the Timeline. However, the effect is still not evolving with time. Indeed, the value of this FX Stack Keyframe is repeated for all frames after the first one. We need to create a second FX Stack Keyframe before applying the FX Stack in order to make the Fade effect evolve with time.
- To do so, go to the last frame of the "Palette" Layer and create a FX Stack Keyframe by clicking on the dedicated Key button of the FX Stack.
You can also go to the last frame and modify the value of the Transparency setting: doing so automatically creates an FX Stack Keyframe.
The Timeline should then look like this:

Note that by moving the Playhead along the Timeline using the [←] and [→] arrow keys of the keyboard or pressing the Play button allows you to view the progress of the chosen effect from the first to the last frame.
To sum up, a FX Stack Keyframe is a kind of setting value lock which allows effects to change with time:
