The anim layer preset
The first preset proposed by TVPaint Animation is named Anim Layer. We have already seen this preset for an Animation Layer thanks to the New button of the Timeline (or in the Layer > New Layer main menu).
We will study this preset in order to have a better understanding on how you can create your own presets, by detailing the 5 sections that form this panel. We will study the three other presets (Background Layer, Colo & Texture Layer et Duplicate Structure) in the last chapter.
The first part will be explained in the next chapter.
Let’s start with the last section

-
The Cancel button on the right will let you go back to your workspace is you opened the panel by mistake or if you wish to cancel your actions.
-
The middle option, Create a Layer, will let you immediately generate a new layer with TVPaint Animation’s default presets, or with those you would have chosen with the Manager’s options, which will not automatically close after creating a layer. If you only wish to create a New Layer without modifying the presets, click on Cancel to leave the Manager.
-
You can also choose to Save the presets. Before creating new presets, you can change the Anim Layers options and save them. The Layer Preset Manager will close after saving.
In the second part, you will be able to
Modify or change the Name of your preset, and choose its Type:

The first text field will let you name your preset as you wish.
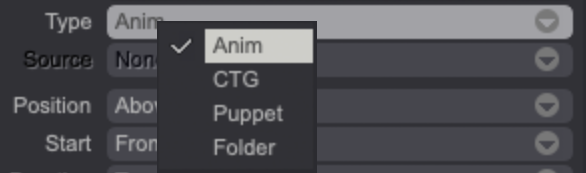
The following parameter will let you choose the Type of the layer you will create:
- An Animation Layer, the most regular one.
- A CTG Layer. This acronym mean Colors and Textures to Generate. This second type of layer has been introduced in TVPaint Animation 11. A large part of lesson 7 will be dedicated to it, but a few details will be given in the Other presets chapter further un this lesson. Likewise, the Source parameter will only work in for a CTG Layer, it will be explained later.
- A Puppet Layer.
- A Layer Folder.
If, for example, you change the Anim Layer parameters, including its name, by clicking again on the New button in the Timeline (or in the Layer > New Layer main menu), you will see that your preset has appeared in the list instead of Anim Layer, with the three other presets.
In this third section, you will be able to

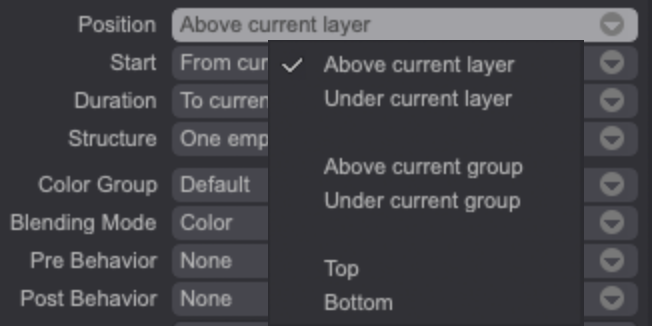
- Choose the Position of the new layer in the stack. Here, the Anim Layer is set to always be created on top the current layer, because in most cases, we wish to add an additional animation on top of the already existing one(s).
However, the contextual menu offers other options :
- Under the current layer will create a new layer under the current one, which can be useful for a layer when colors will be added (like the Colors and Textures to Generate for example).
- On top of the current group and Under the current group work the same way as the first two choices, but they are applied to the current color group (see the previous chapter for explanations on the color groups).
- Top and Bottom will create a layer either on top of the layer stack, or on the bottom, whatever the layer or current group is, which can be useful for backgrounds elements for example.
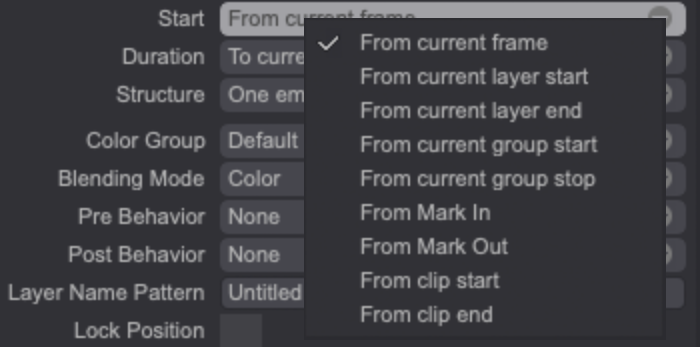
- Choose where the layer Starts. Here, the Anim Layer is set to begin on the Current Frame. Other options are as follows :
- From current layer start or from current layer end
- From current group start or from current group end
- From Mark In or from Mark Out (this concept will be explained later on this lesson)
- From clip start or from clip end
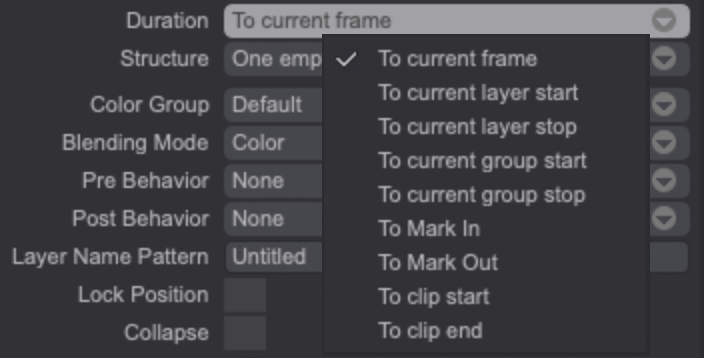
- Choose the layer’s Duration. Here, the Anim Layer is set to go to the current frame. It will be made of an unique instance, which will be on the current frame. Other options are as follows :
- To the beginning or to the end of the current layer
- To the beginning or the end of the current group
- To Mark In or Mark Out
- To clip’s start or to clip’s end
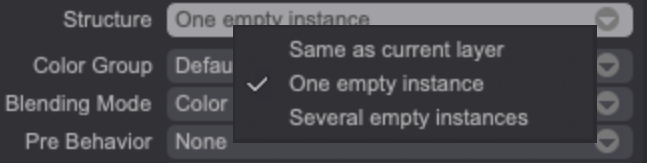
- Choose its Structure. Here, the Anim Layer is set to have Only one empty instance, which will be made of one only exposure cell, as the instance will go from the current image to.. the current image. It’s up to you to create the following ones for your animation, as we learned in the previous lesson. You will have two other options to set the layer’s Structure :
- Same as current layer will let you have a given number of empty instances, but with the same expositions as the current layer.
- Several empty frames will let you create a given number of empty instances, exposed one after the other, with one exposition cell each.
This Structure’s length will depend on the parameters you have set in the two previous options (Start and Duration).
In the fourth part, you will be able to :
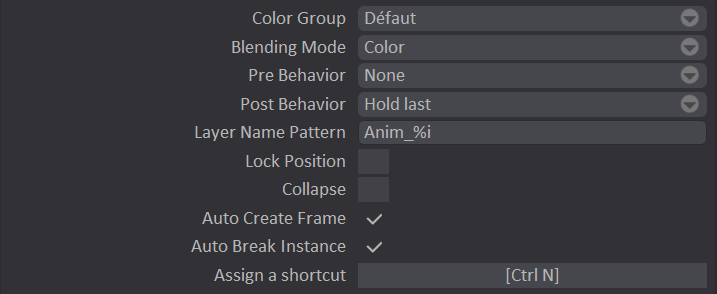
- Choose a Color Group
- Choose the Blending mode
- Choose its Pre Behavior
- Choose its Post Behavior
We explained these function in the previous chapter (The auxiliary options in the Timeline). The Blending modes concept will be explained in the end of this lesson.
Here, the Anim Layer is set to have the default color group, the most common blending mode (Color), and have no Pre or Post Behavior, to create new instance as easy and fast as possible.
- Choose a Pattern name : here, a green square (alphanumeric field) will let you give your layer a Name. By default, it is named Anim_%i. You can change Anim by any words you wish (Colors, Shadows, Characters, etc.). The percent and the letter i after _ will in fact let you increment the name of the layers you are going to create using this preset. For example : Character_%i in the preset will become Character_ 0 for the first layer, Character_ 1 for the second one, Character_ 2 for the third, and so on…
You have other incrementation options at your disposal : %Y = current year (2025 right now) %m = month (01 for January, 02 for February, etc, until 12 for December) %d = day (between 01 and 31) %H = hour (between 00 and 23 h) %M = minute (between 00 and 59 minutes) %S = second (between 00 and 59 seconds) %i = incremental integer (0 then 1 then 2, then 3, etc) %pt = preset type %cln = current layer’s name
This can be very useful when you want to put a date on your work, or create a corrections layer for students or an animation team, and when you want to date your work.
This list can also be seen when the Tooltips in the Help main menu are in Full mode.
You can then choose to :
- Lock position
- Collapse
- Activate Auto Create Frame
- Activate Auto Break Instance
The first and the last two functions have already been explained in lesson 3. The Collapse option has been explained in the previous chapter, in the Auxiliary options in the timeline.
Here, the Anim Layer is set to ease as much as possible the creation of new images, while being able to change its position, and of course, to be visible as soon as it is created.
At last, you can immediately Assign a shortcut. Here, an Anim Layer be created using [Ctrl N] but this shortcut can easily be changed. If you click on the key, the shortcut panel will open (you don’t need to go through the Edit main menu to open it, as seen in lesson 1).