Light table overview
The Light Table is one of the classic animator tools available in TVPaint. It allows you to display a tone-down view of the images preceding and following the current image. This tool is very useful when trying to draw in-betweens for example.
To use the Light Table, make sure you are on the layer you wish to use it on and click on small dot located under the light bulb icon:
Once this is done, you can click on the Menu Bar's bigger light bulb ![]() icon or select the Windows > Animation > Light Table item in the Main Menu to open the Light Table panel:
icon or select the Windows > Animation > Light Table item in the Main Menu to open the Light Table panel:
Here is a GIF example of the Light Table being used with the Francis Fox project:
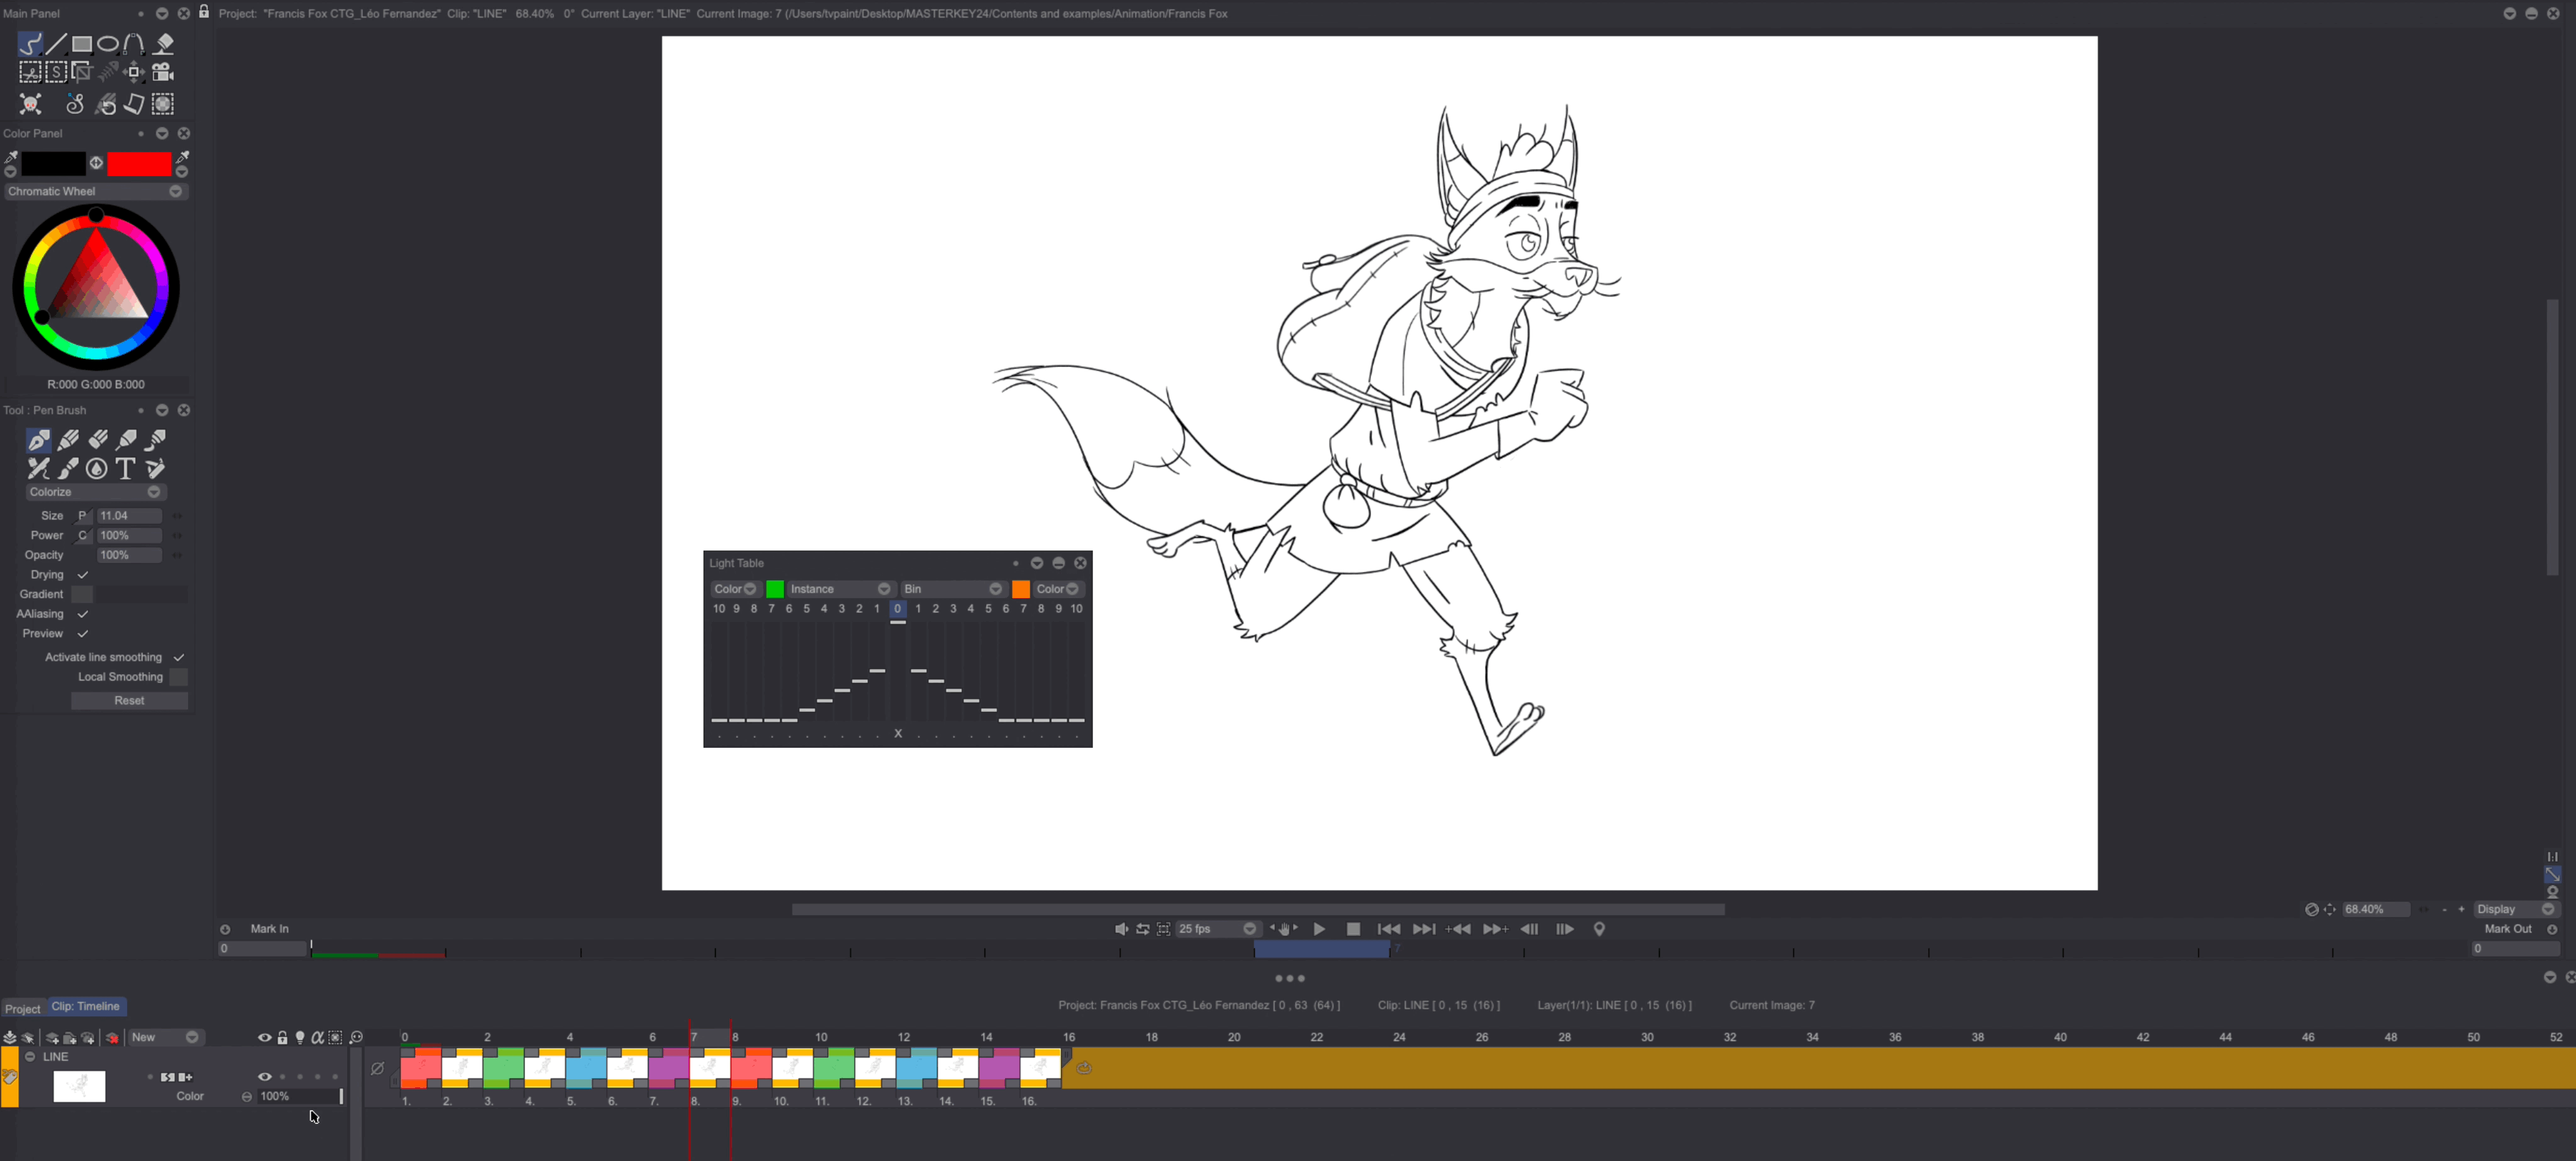
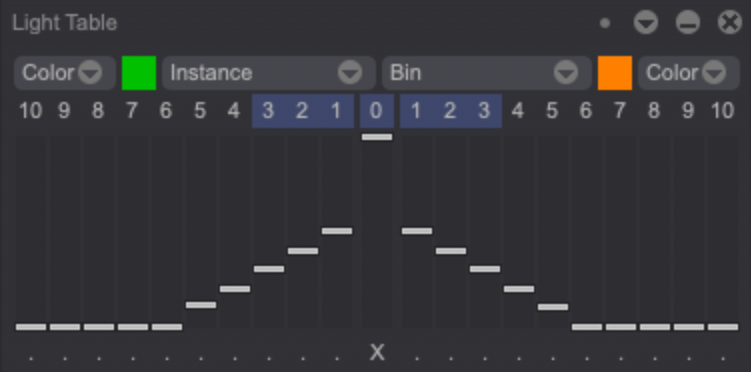
As you can see:
- The "0" frame on the Light Table panel is your current frame.
- Clicking on another a frame number lets you turn the Light Table on for this frame.
- By default, the previous frames' content will be colored green. This can be changed through the Color drop down menu (you can use the content's original colors -Image Color, a Gradient or a shade of the chosen color -Tint-, which can be useful when animating filled shapes). The default color can also be changed by clicking on the colored square (your cursor will then turn into a picker letting you select another color).
- By default, the following frames' content will be colored orange. This can be changed by using the same options we have just mentioned above.
- The sliders let you set the frames' opacity level when using the Light Table. By default, the frames which are the closest to your current frame will have an higher opacity level than the frames which are located farther.
- Click on the Bin > Reset everything item to reset the Light Table to its default settings. This drop down menu also allows you to load or save custom Light Tables.
The Instance drop down menu lets you tinker with other settings:
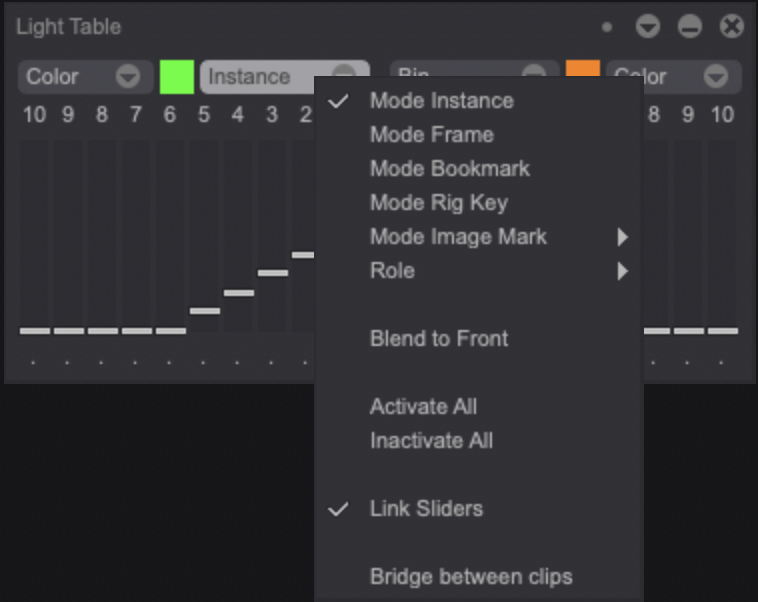
- The Light Table can either be applied to Instances' Heads (Instance Mode), Frames (Frame Mode), Bookmarked images (Bookmark Mode), Rig Keys (Rig Key Mode) or Marked images (Image Mark Mode).
- The Blend to Front option allows to display the Light Table images over the current image.
- The Activate All and Inactivate All options let you turn the Light Table on / off for all frames at once.
- The Link Sliders option links the sliders so they move together when you are moving a single one.
- The Bridge Between Clips option allows you to use the Light Table on Clips when using the Project: Timeline View in TVPaint's Storyboard section.
Only instances' heads will be taken into account in Instance Mode, whereas all exposure cells will be taken into account in Frame Mode.