Additional operations
Paths
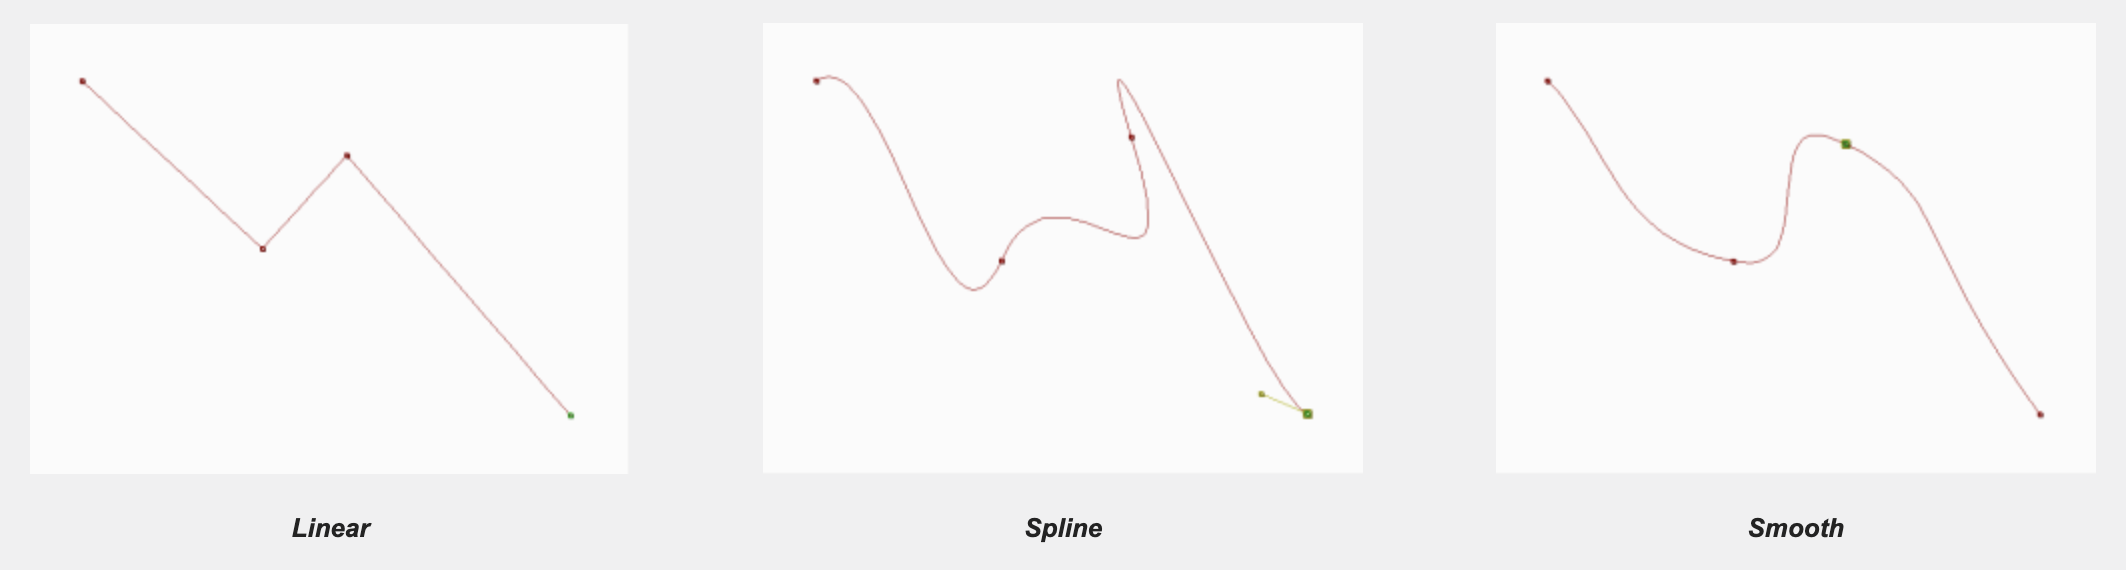
When position settings progress in time, there must be a path taken by the parameter in question:

For example, three FX Stack Keyframes were created at images 1, 6 and 30 for the Center setting. The center of the Center Blur effect consequently follows a path as time progresses. In our example, the path is visible via the HUD and looks a bit like a red « V ».
It is possible to choose an interpolation mode between the FX Stack Keyframe points which define your paths: click on the first pop-up (on the screenshot above, it is set to Linear). You may choose to connect the points in a Linear, Spline or Smooth manner using the effect's first menu.
When using the Spline mode, it is possible to use handles to modify the spline. The [Ctrl] key + mouse click on a handle are used to move this handle only.
Paths are reviewed in greater detail in the Effect categories > Motion section of this user manual.
Moving from FX Stack Keyframe to FX Stack Keyframe
It is not always easy to place yourself on a FX Stack Keyframe within the Timeline, especially when the Project contains many images. The Arrows buttons in the FX Stack are used to move rapidly from one Key to another without having to use the < and > keys or the mouse:

Those buttons being colored in white means that there is a FX Stack Keyframe on the left or the right of the current position. Them being colored grey means there are no more FX Stack Keyframes to go to.
The contextual menu for the FX Stack Keyframes
A right click in the Timeline on a FX Stack Keyframe line, calls up a dedicated contextual menu:
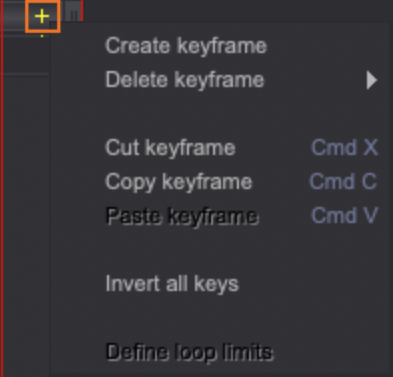
You may :
- Create or Delete Keyframes (which requires confirmation),
- Select One or All Keyframes (they will then be displayed in gray),
- Cut, Copy, Paste Keyframes (a process already used for images and Layers).
When using FX Stack Keyframes:
- The Layer contextual menu offers the possibility to select the frames corresponding to the FX Stack Keyframe line.
- The Auto Fit** menu (which can be accessed by right-clicking on the magnifying glass to the left of the Timeline) is used to adjust the zoom of the Timeline in order to view all the FX Stack Keyframes.
Contract, stretch a Keyframe line
In the previous lessons we learned how to contract or stretch an Animation Layer. This is also possible for Keyframe Lines.

If required, it is possible to move a Keyframe from one place to another in the Timeline (click and slide with the left mouse button):

Use the selections
When you make a selection on the screen and then apply an FX Stack, the latter is only applied to the selected area (whether you apply the Stack to one or several images makes no difference).