Managing effects with several parameters
Open the Palette Project again.
- Merge the Layers of this Project.
- Stretch them over twenty frames.
- Select the Blur > Center Blur effect.
Your Timeline should then look like this:

To make things easier, we have deliberately chosen to work with an Animation Layer repeating the same image. Everything that follows also applies to a regular Animation Layer.
You may notice three settings which can be locked to a FX Stack Keyframe:
- the Position of the Center of the blur effect,
- the Power of the blur,
- the Radius of the circle in which the blur effect is not applied.
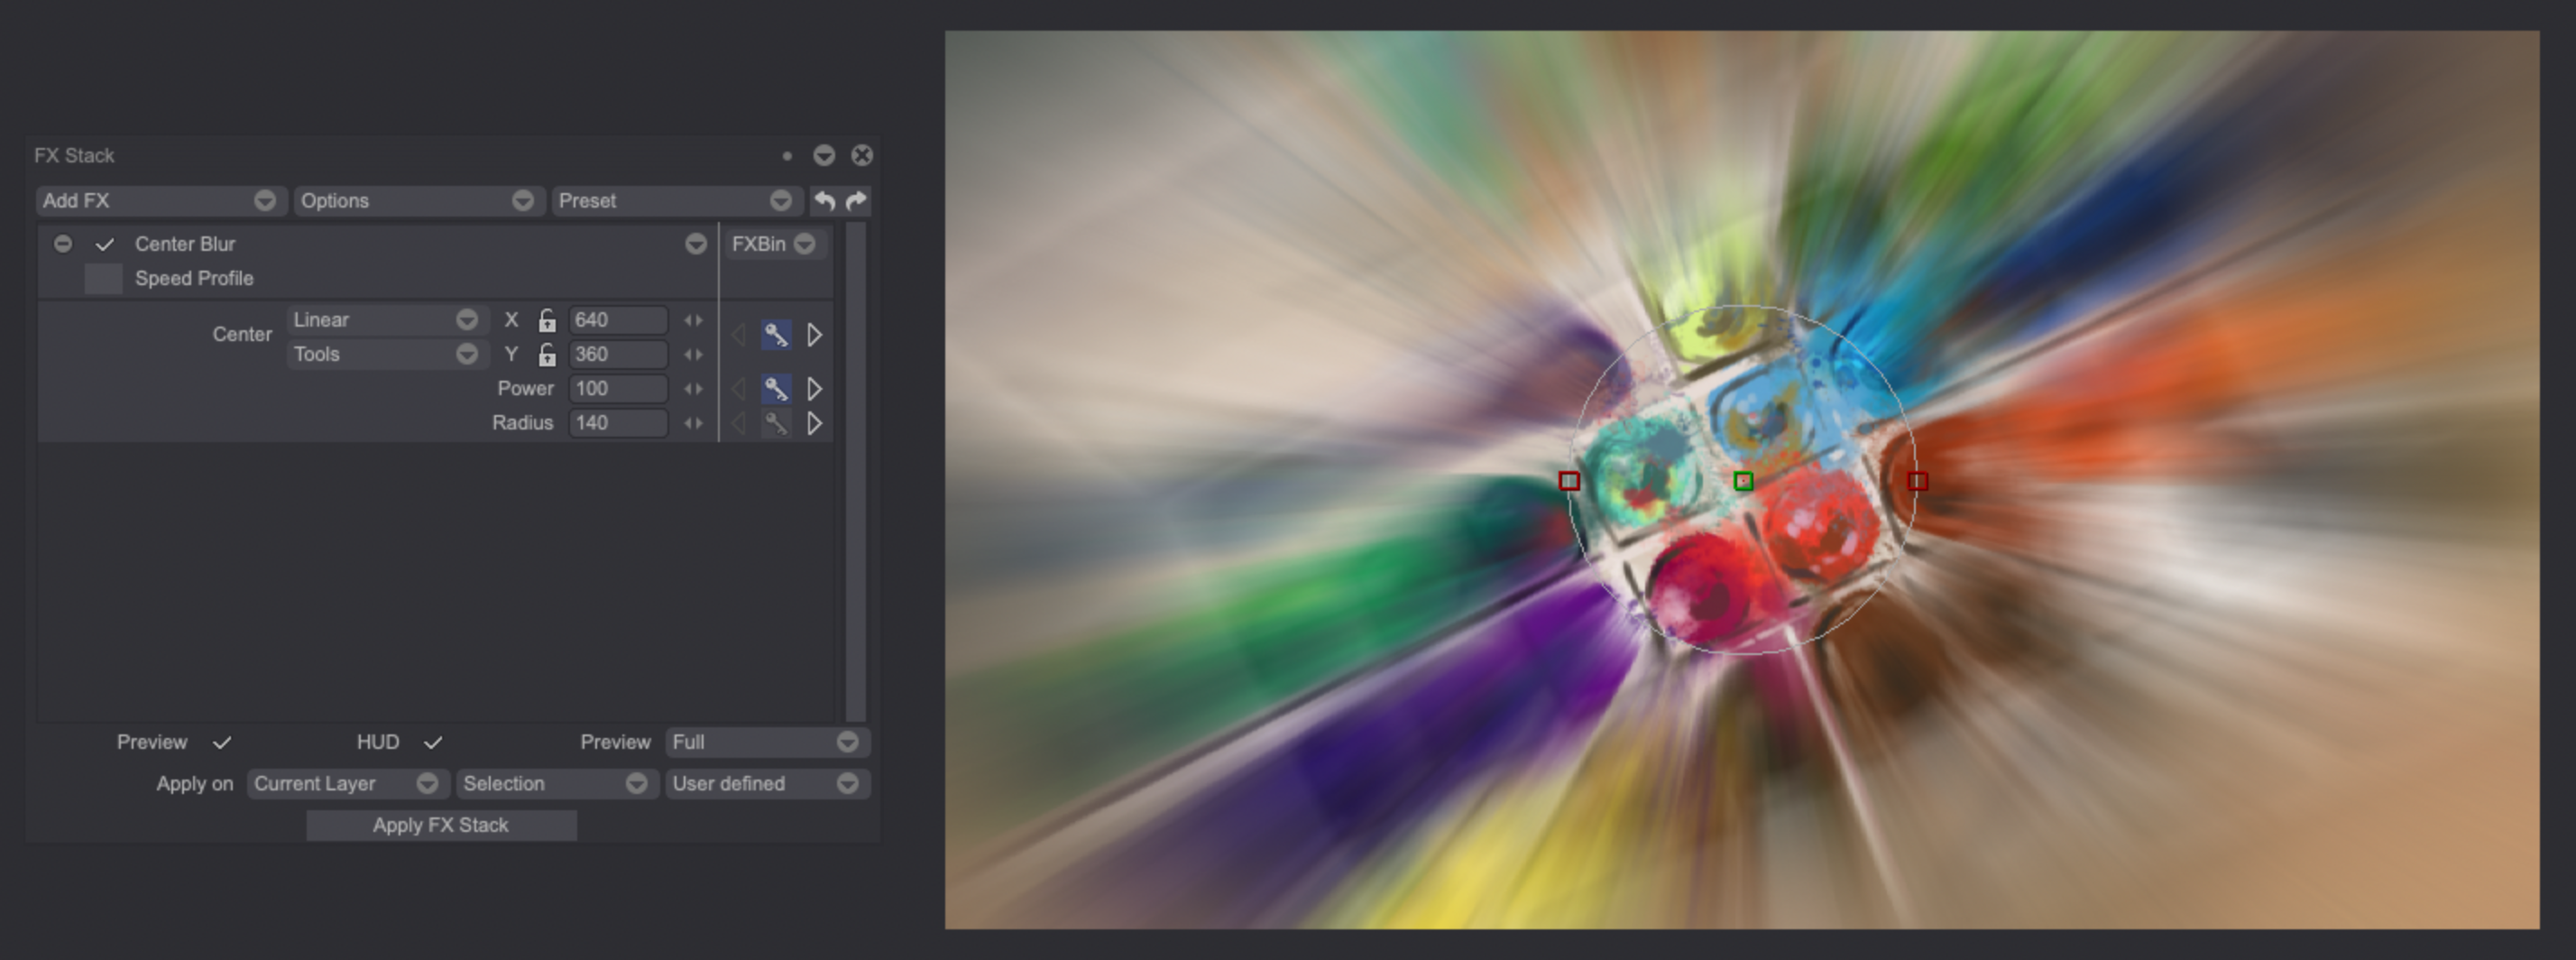
The position of the circle in which the blur is not applied as well as its center are shown in the Preview.
Some parameters may be adjusted directly on the screen by clicking and sliding the mouse on the color handles. When the effect is applied, circle and handles will, of course, have disappeared.
The parameters which are directly adjustable on the screen (handles, circles, spline) are referred to as HUD (HUD stands for Head Up Display). The HUD checkbox of the FX Stack can be used to hide the latter.
Now let's take a look at the Timeline:
- As soon as a FX Stack Keyframe is created, a left click on the "+" button near Center Blur in the Timeline displays the name of the parameter which has been set with the FX Stack Keyframe.
- Matching FX Stack Keyframe lines will be displayed to the right of the settings' names, as you create your FX Stack Keyframes.
It is possible to create FX Stack Keyframes for each parameter, for the frame of your choice along the Timeline.

A separate set of FX Stack Keyframes may be created for each parameter (Center of circle, Power, Radius). This means that the parameters may progress in time independently of each other. For example: the Power of the centred blur may decrease slowly while its Radius may increase rapidly, following different timings.-
Thanks to the use of several FX Stack Keyframes, the settings can be adjusted in time. This is the case for the Center parameter in the Timeline above: three FX Stack Keyframes are placed on the Center setting's FX Stack Keyframe line.
The resulting effect can be seen below:
The first FX Stack Keyframe line in the Timeline has the name of the effect in the stack and displays all its FX Stack Keyframes.