Splitting instances
As we mentioned before, if the Auto Break Instance option is active, modifying an Instance's Exposure Cells will break this Instance into two smaller Instances.
The Auto Break Instance option can be activated on a per-layer basis in the Layer Stack, by clicking on the second dot icon, located on the right of a layer's thumbnail. When Auto Break is on, you will notice this icon on your layer:

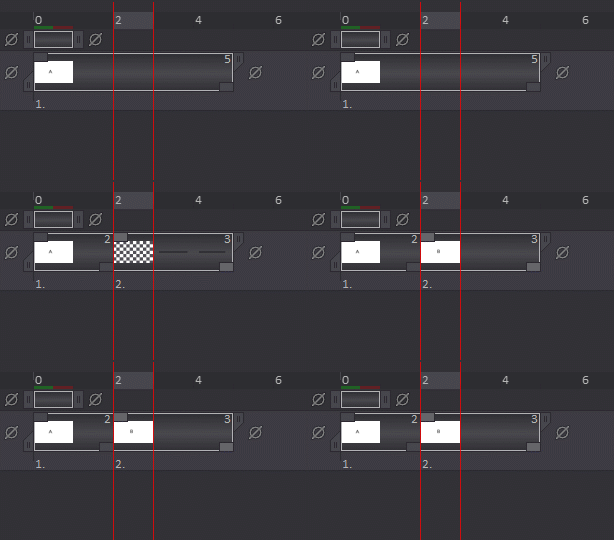
In the example below, the letter “A” has been drawn on our current Instance and Auto Break is on. We then delete the contents of the second Exposure Cell: a new, empty Instance is then created. We finally draw the letter “B” on our second Instance Head. As you can see, we now have two different Instances: the first one will display the letter “A” and the second one will display the letter “B”. Thus, we will see the following images when playing the sequence back: A-A-B-B-B:

When Auto Break is off, no new Instance will be created upon modification of an Instance's Exposures. Instead, the changes made to an Instance's Exposure will be reflected on its Head Cell as well.
It is also possible to force the splitting of an Instance. Place the Timeline's playhead at the location you want to split your Instance, and select the Image > Instances > Break Instance item from the Main Menu (you can also right-click on an Exposure and select the Exposure > Break Instance item from the dedicated contextual menu).