Animate mode
Once you have finished rigging your drawing, you can now switch the Puppet Tool to Animate Mode:
All of the bones you had added in Rigg Mode will then turn blue. Animating with the Puppet Tool will rely on adding keyframes on the Timeline. Those keyframes will denote a change of state (angle, scale) for a bone and its relative layer. TVPaint will then automatically create the inbetweens between two keyframes, saving you some time when animating simple movements.
Simple rotations
To animate an element of your character, just extend its corresponding layer and position the playhead at the movement's end. Then, move the relative bone to its final position using the on-screen HUD. TVPaint will automatically create inbetweens:
You will have noticed that a keyframe will have been created at the location you have changed your bone's angle:
Should you want the end of the movement to end sooner, simply click and hold on this keyframe on the Timeline to move it elsewhere.
Squash and stretch
Beyond simple angle rotation movements, you can also squash and stretch your bones in time and animate the change. To do so, simply hold the "CTRL" key while moving a bone on the on-screen HUD. Move it from top to bottom to stretch it lengthwise and from left to right to stretch it across the width:
Global movements: the bounding box
You can also move the angle of your whole drawing or its scale through the Bounding Box which appears all around your drawing through the on-screen HUD:
Hold the "CTRL" key while grabbing one of the Bounding Box HUD's squares if you want to change your drawing's width and length ratio when resizing it.
Changing the Bounding Box properties will create a special keyframe, which is represented by a different icon than the others:
This keyframe will appear on the layer you have first created a bone for, since it will be the only bone of your rig which has no parent.
Locking bones
You can lock a bone by right-clicking on it and selecting the Lock Bone option. The target bone will then turn green and be locked whenever you move parent bones:
To unlock a locked bone, simply right-click on it and select the Unlock Bone option.
Speed curves
By default TVPaint will create a linear movement between two keyframes. You can however change this to fine-tune the timing of your animation through the use of Speed Curves:
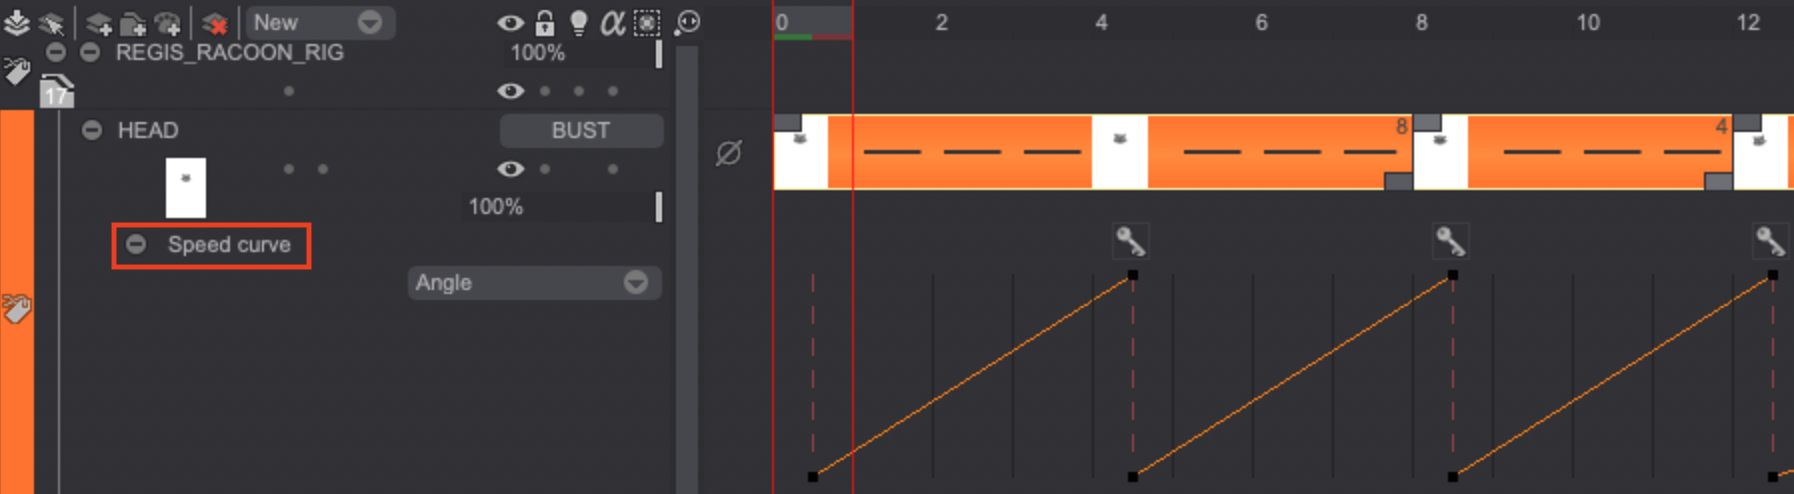
As you can see, you will have the possibility to change the default linear curve between two keyframes by clicking on the curve to add control points:

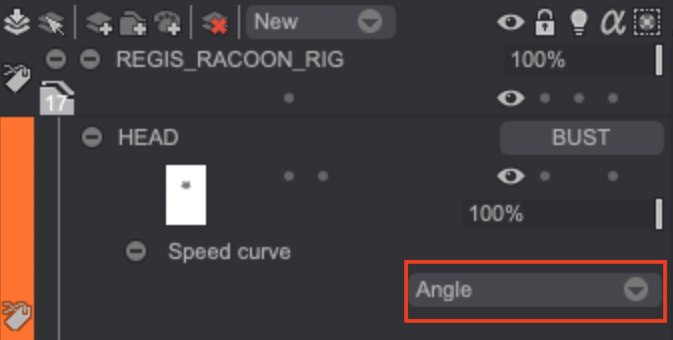
You will also have access to two different curves sets depending on the parameter you wish to modify the Speed Curve of. You can indeed change the Speed Curve for Angle or Scale changes. To switch between curves, simply click on the dedicated drop down menu pictured below:
Finally, right-clicking on a curve will give you several options:
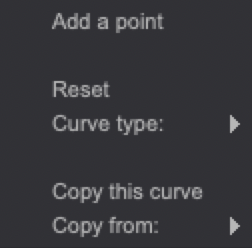
Select:
- Add a point to create a new control point on your curve.
- Delete the selection to delete the selected control points (highlighted in yellow) from the curve (you can select multiple points by holding the "CTRL" key while clicking on them).
- Reset to set a curve back to its default state.
- Curve type to make the curve between two keyframes Linear or a Spline.
- Copy this curve to copy a curve between two keyframes so you can paste it between two different keyframes.
- Paste this curve to paste a previously copied curve.
- Copy from... to copy a curve from another setting (for example, the Scale curve).
Creating and editing keyframes with the Puppet Tool
As we have seen, keyframes are automatically created whenever you change a bone's angle or stretch it (the same applies to the bounding box) using the on-screen HUD. However, you can also create keyframes through the use of the Puppet Tool icon shortcuts:
Each one of those shortcuts will create different keyframes:
- The Bounding Box icon shortcut will create a bounding box keyframe at the playhead's position (on the layer which has no parent bone).
- The Master Key icon shortcut will create regular keyframes on all of the Puppet Layers at the playhead's position.
- The Regular Key icon shortcut will create a regular keyframe on the current Puppet Layer.
Right-clicking on a keyframe will give you access to a new contextual menu to edit your keyframes:
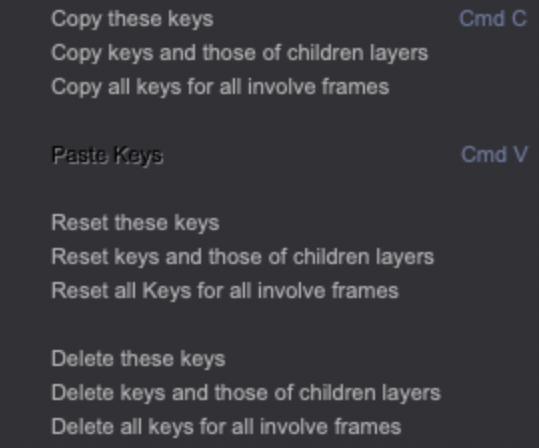
You will be able to Copy, Paste, Reset the settings and Delete keyframes from this menu. Those actions can be applied to the selected (these) keyframes, the selected keyframes and those of the children layers, the involved frames (meaning the selected keyframe plus those located at the same position).
Those actions will not do anything if no keyframe is selected. Selected keyframes will be framed with a yellow highlight.
You can select multiple keyframes by holding the CTRL key when clicking on them.
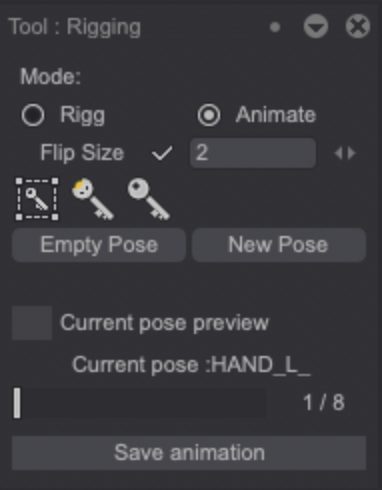
Flip Size (precomputation)
The Puppet Tool's last option called Flip Size allows you to enable a precomputation of a number of inbetweens before and after the current image when a bone is modified. TVPaint usually does those calculations upon playback, so enabling this option will allow to quickly see what the previous and following frames of an image will look like while you are modifying a bone's angle or scale, without having to play the whole animation back.
The higher the number of the dedicated Flip Size field, the higher the number of precomputed inbewteens will be. However, increasing this number may have an impact on the software performance depending on your computer's specifications.
For example, when turned on and set at '2', the Flip feature will precompute the two frames before the current image and the two frames that come after as well.