Rigg mode
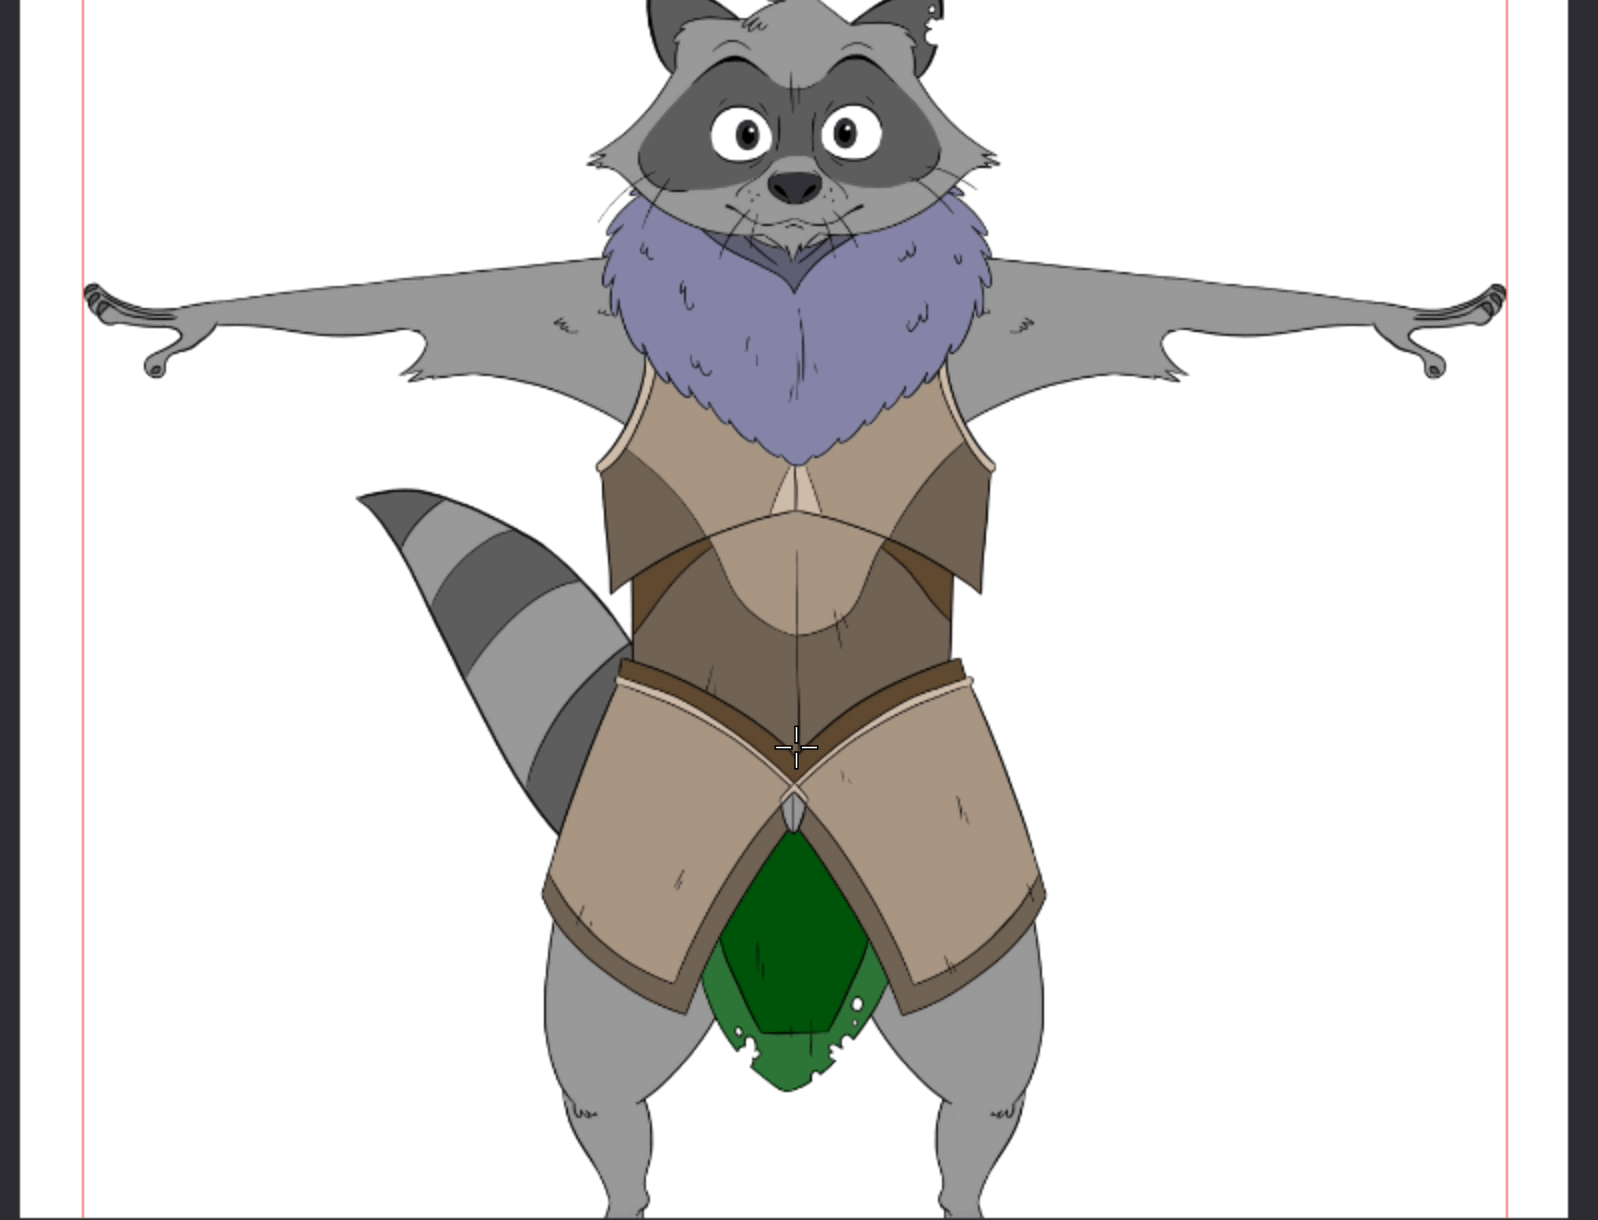
Once you have created a Puppet Layer Folder containing Puppet Layers, it is time to rig your drawing. Rigging consists in adding bones to a drawing so that you can move them afterwards to create an animation without drawing inbetweens.
You will have noticed that the Main Panel automatically switches to the Puppet Tool when a Puppet Layer is selected and that a few other tools will not be available when using this one.

This Puppet Tool has a Rigg mode in the Tool Panel, allowing you to add bones to your drawing and the Animate mode allowing you to animate your drawing once bones have been created. It also has a few shortcut icons which will help you create keyframes when animating:

Adding bones
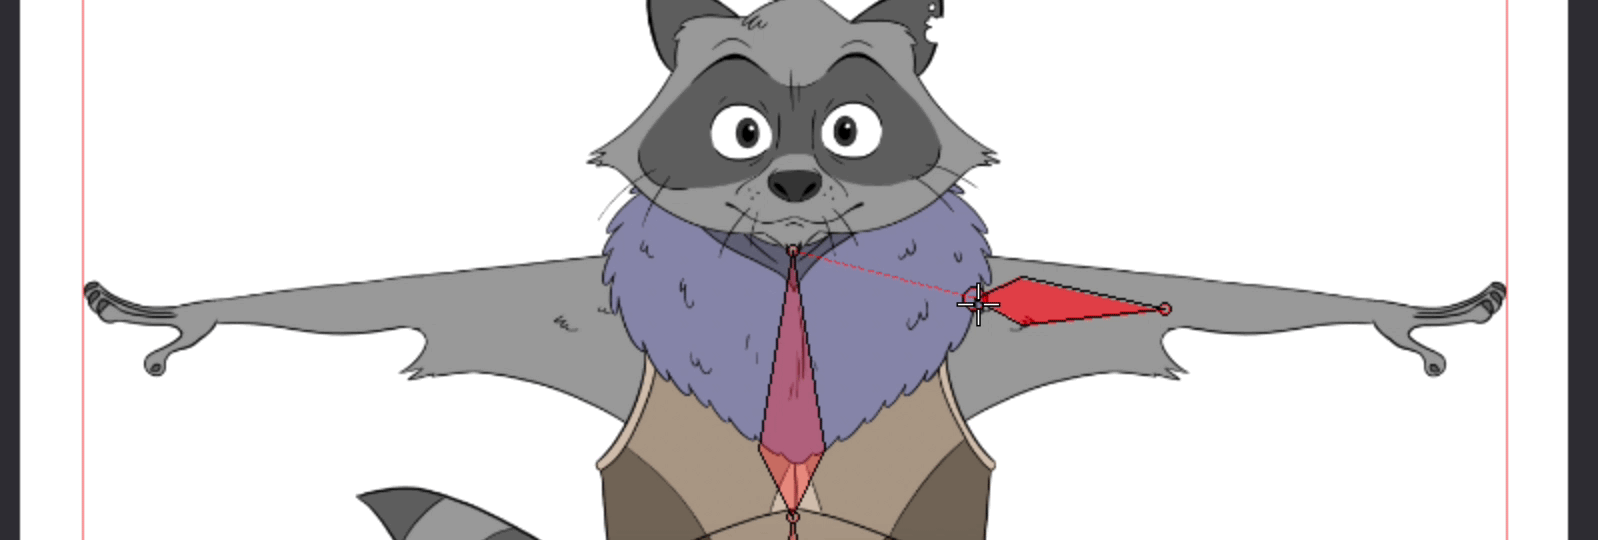
To add bones, make sure you have the Puppet Tool set to Rigg Mode first. Once this is done, simply click and drag on an element of your drawing to create a bone for it. When releasing your click, a pop-up menu asking you to select a layer the new bone will be associated with. TVPaint will automatically suggest a layer by putting it first in the pop-up menu list and will mark it as (hover):
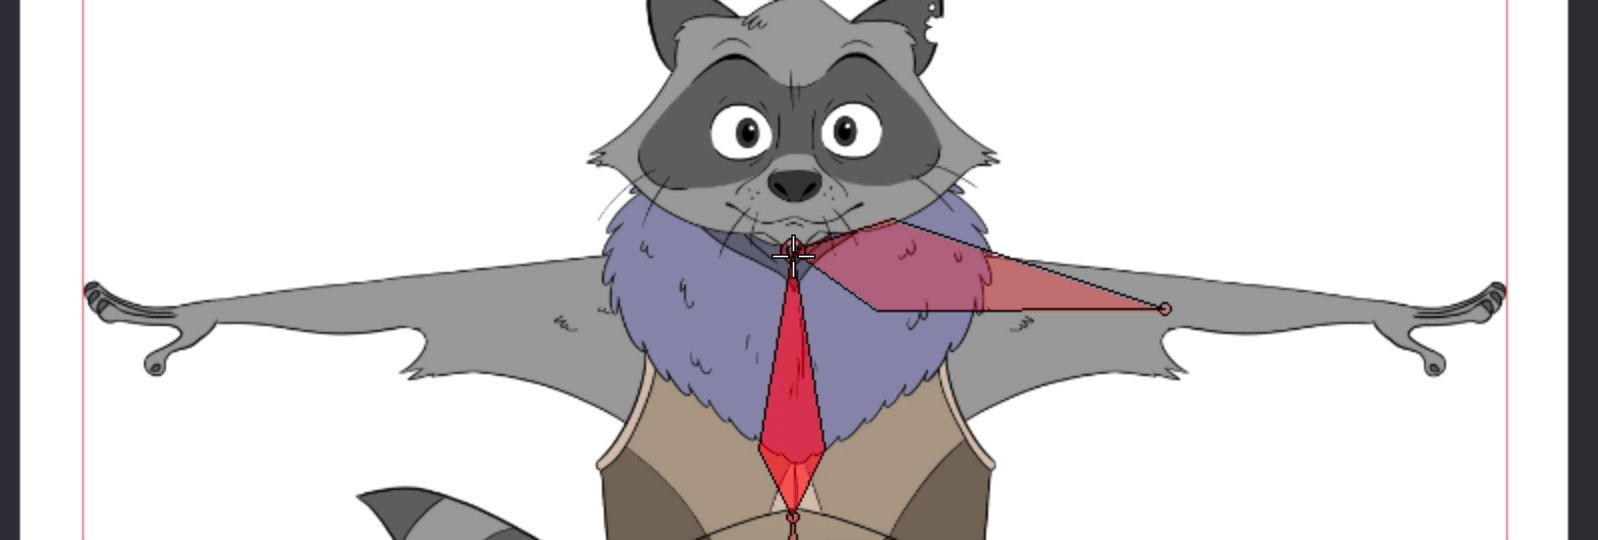
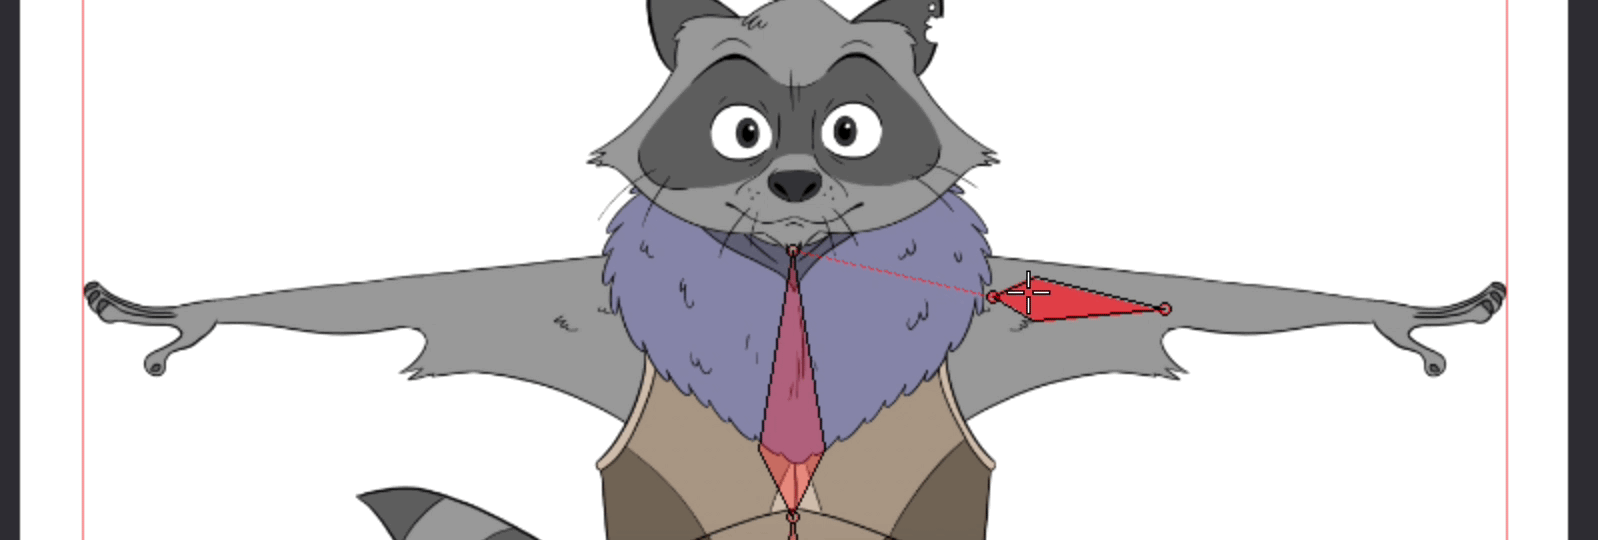
Creating child bones is easy. To do so, simply hover the parent bone: it should turn to a vivid red. Now, simply create a new bone from there:

Parenting between the two bones will be automatically added by TVPaint and will be symbolized by little text boxes located on the right side of Puppet Layers thumbnails in the Layer Stack:

You can also create a child bone which is removed from one of the parent bone's extremities. To do so, simply hover over the parent bone to select it and start the child bone creation at the desired location. A red dotted line will represent the link between the two bones:

It is imperative that each one of your Puppet Layer is linked to a bone for you to be able to move to Animate mode.
Editing bones
You can change a bone's position or size by clicking-and-holding on one of its extremities while holding the "CTRL" key:
You can also detach a bone from its parent to place it farther from it (without breaking the parenting link between the two) by clicking-and-holding on its extremity while holding the "CTRL + Shift" keys:
You can also re-attach a bone to its parent by right clicking on it and selecting the Attach Bone to Parent option:
You will also be able to change a bone's relative pose by selecting the Change Pose option from the same contextual menu. Changing it's parent is also possible through the Change Bone Parent option:

Finally, you can delete a bone by selecting the Delete Bone option, also pictured above.
Completed rigs can be copied and pasted to other projects. To do so, simply copy all of your Puppet Layer Folder and paste it on another project.