Settings and Application
Once the texuring process has been started, a new Layer with a single empty Instance is automatically created. This Layer will be named after the previously selected texture's name:
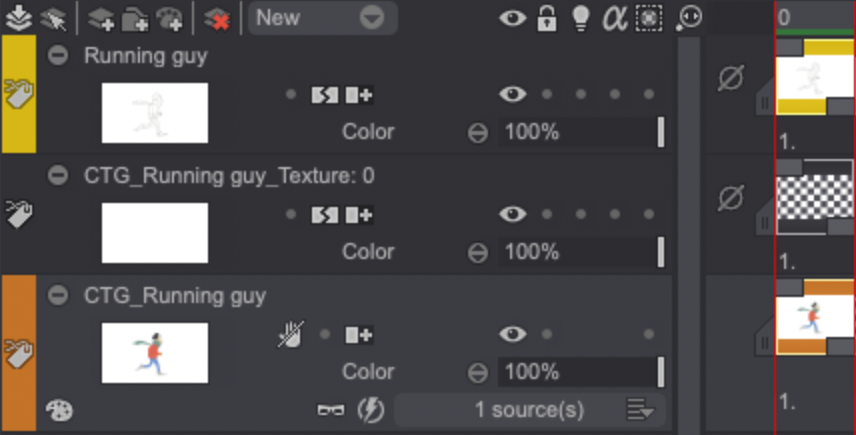
However, application of the texture must be done while the corresponding CTG Layer is the current Layer. Still, the results of the application will be baked to the newly created Layer.
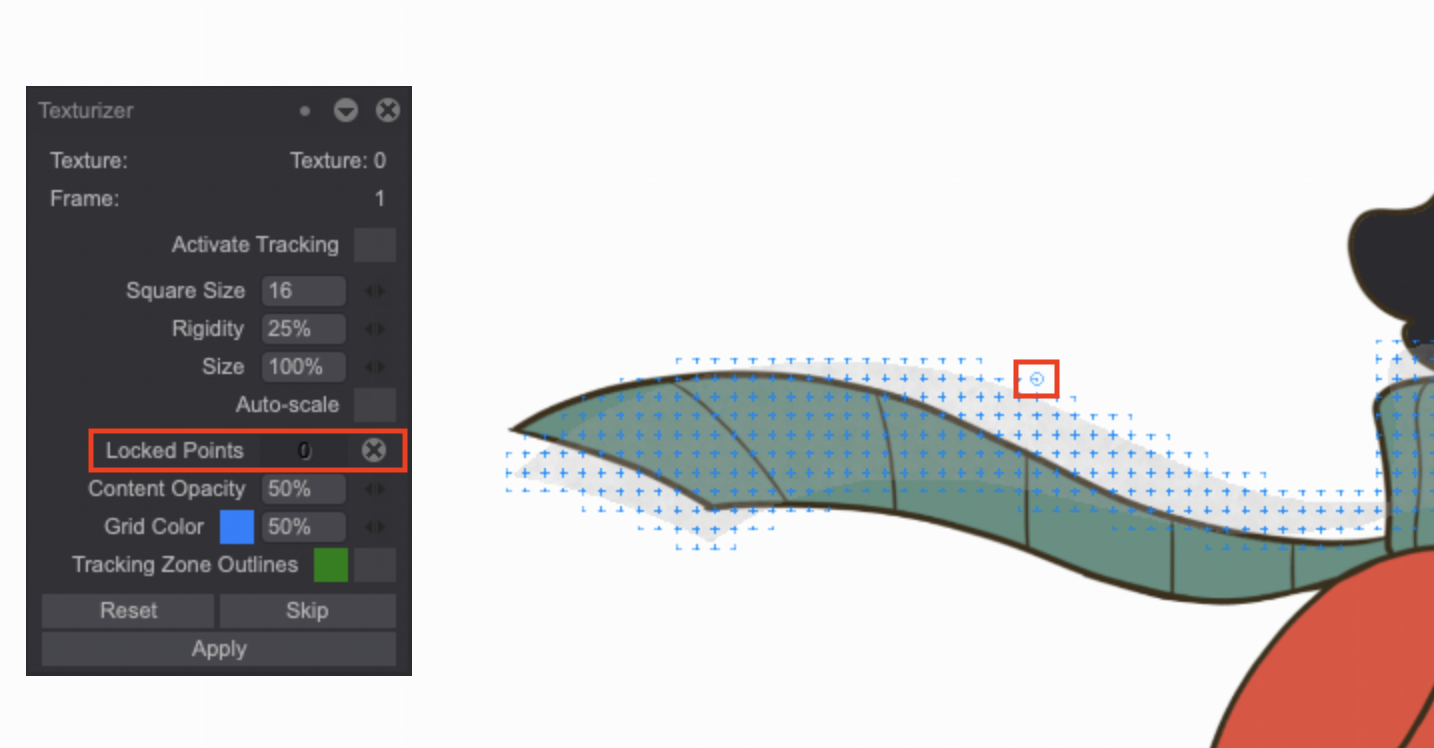
The texture to be applied appears in with a warp grid around the Tracking Zone color in the Canvas (in our case, Bob's scarf):

The Texturizer's settings are then available in the Tool Panel. The Name and Format of the texture to be applied as well as the current image are mentioned on the Panel:
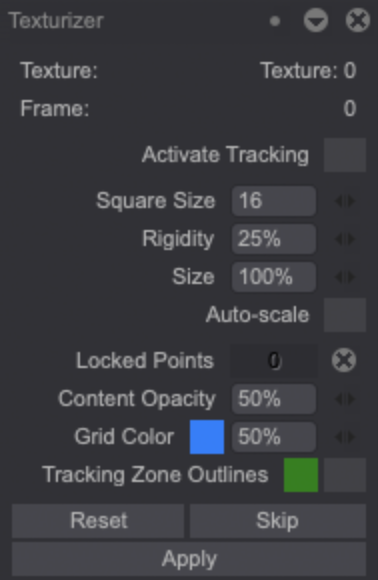
The following settings will help you set the texture at your convenience:
-
Activate Tracking: this option is, by default, inactive. Once checked, it will set the texture from one instance to the other by doing its best to stay true to the shape of the color zone. Activating it will save you some time for the application of the textures. For a manual control, do not check this option. Application will be slower, but more precise.
-
Square Size : controls the warp grid squares' sizes (from 4 to 100). The smaller the squares, the more precise the deformation will be, but the grid will also be slower to interact with. The bigger the squares, the less the deformation will be precise. It will be faster to compute but you will be limited in the deformation possibilities.
-
Rigidity: sets a value between 1 and 100 to the texture's elasticity.
-
Size: will let you modify the size of the texture by a percent value.
-
Auto-scale: this option is inactive by default. Once checked, it will help setting the texture from one instance to another by doing its best to stay true to the shape (size) of the color zone.
-
Content Opacity: controls the opacity of the preview, by default at 50%. This option only affects the texture's preview. Once applied, the texture will be at 100% opactiy level, regardless of this setting. You will be able to change opacity directly in the Layer.
-
Grid Color: this option lets you change the grid's color, i.e. the squares. You need to click on the blue (by default) square to get a color picker. You can then choose a color in the Color Panel or in the software's interface. The adjacent value (50% by default) allow you to change the grid's opacity.
-
Tracking Zone Outlines: this option is by default inactive. Once checked, it will let you see the Tracking Zone outlines (in green by default, this color can of course be changed).
-
Reset: lets you go back to the initial shape of the texture, unless you clicked on Apply.
-
Skip: lets you move to the next instance without applying the texture.
-
Apply: click on this button on each Instance to apply the texture, once satisfied with the results, and then move to the next Instance (you can also use the [Enter] shortcut).
Once the texture has been applied to all Instances, the Texturizer Tool panel will disappear, and the newly created Layer will contain the applied texture.
The Reset button does not behave like classic reset buttons which go back to the panel or function’s default parameters. The Texturizer Tool panel does not have this kind of reset button, you need to manually change the parameters to go back to the default ones.
Like the Warp tool, the grid can be pinned to lock a specific area of your texture through the use of the Shift + Right Click > Lock this point command.
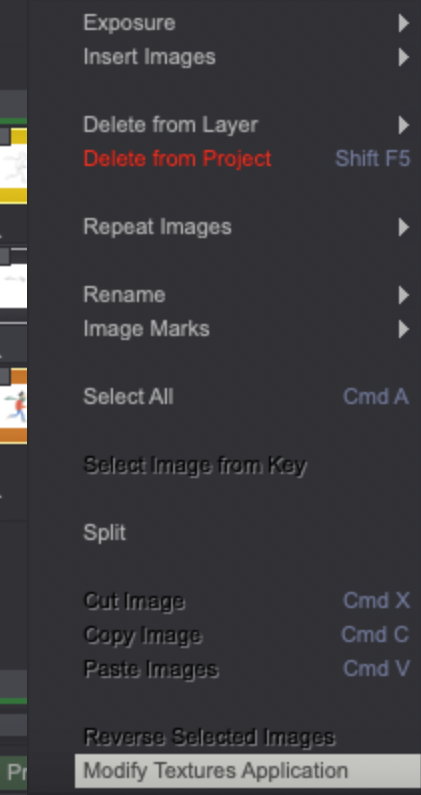
If you are not satisfied with the final result, you can still open the Texturize option once again. By checking the Reset Tracking option and clicking on the Start button, you can start the texture's application once more from the first Instance. If you only wish to adjust the texture on a specific Instance, simply right click on the desired Instance and select the Modify texture application in the dedicated sub-menu:
You will then have access once again to the Texturizer Tool panel to change the texture's application and make it to your liking.