Tracks preview and editing
Let's take a look at the right side of the audio section. All the audio tracks are graphically represented by waveforms there. The Master Track's waveform is the "sum" of all the Project's tracks':

You can edit the tracks in various ways, as explained below:
- Moving a track: the Offset option has already been described in this subsection. Note that you can also click on an audio track's waveform and drag it to the desired location.
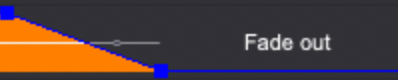
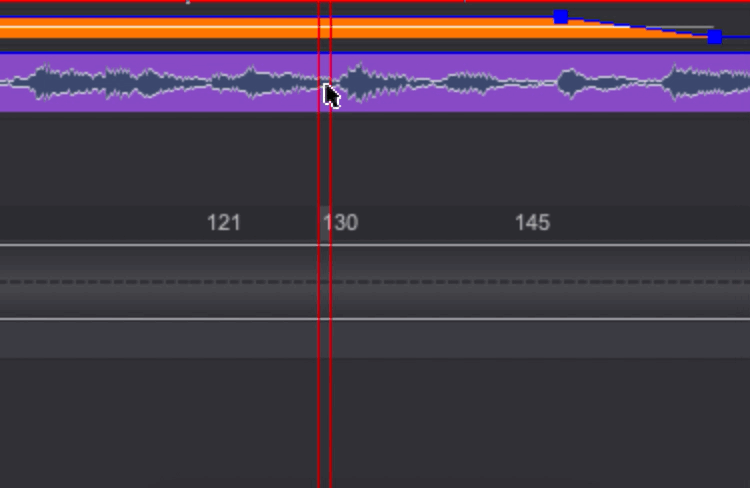
Some blue lines can also be seen on each audio track. The aim of these lines is to apply a basic Fade to tracks:
- When the blue line is at the bottom of the audio track, the track's level is at its minimum (i.e. no sound is played back).
- When the blue line is at the top of the audio track, the track's level is at its maximum.
- The program fades the audio sound in function of the blue line's slope relative to time and between the minimum and the maximum values of the audio track's level.
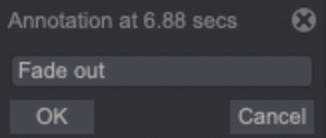
It is also possible to add Annotations on each audio track and at any location. Double-click on a track to make a popup appear and enter the text to be displayed.
-Right click on an audio track in order to Split the current track. This action doesn't really split the track: it duplicates the current track and adjusts levels on both to simulate the splitting of the current track:
The Undo ([U]) and Redo ([Shift]+[U]) actions are obviously available when editing audio tracks.