Load an image or animation
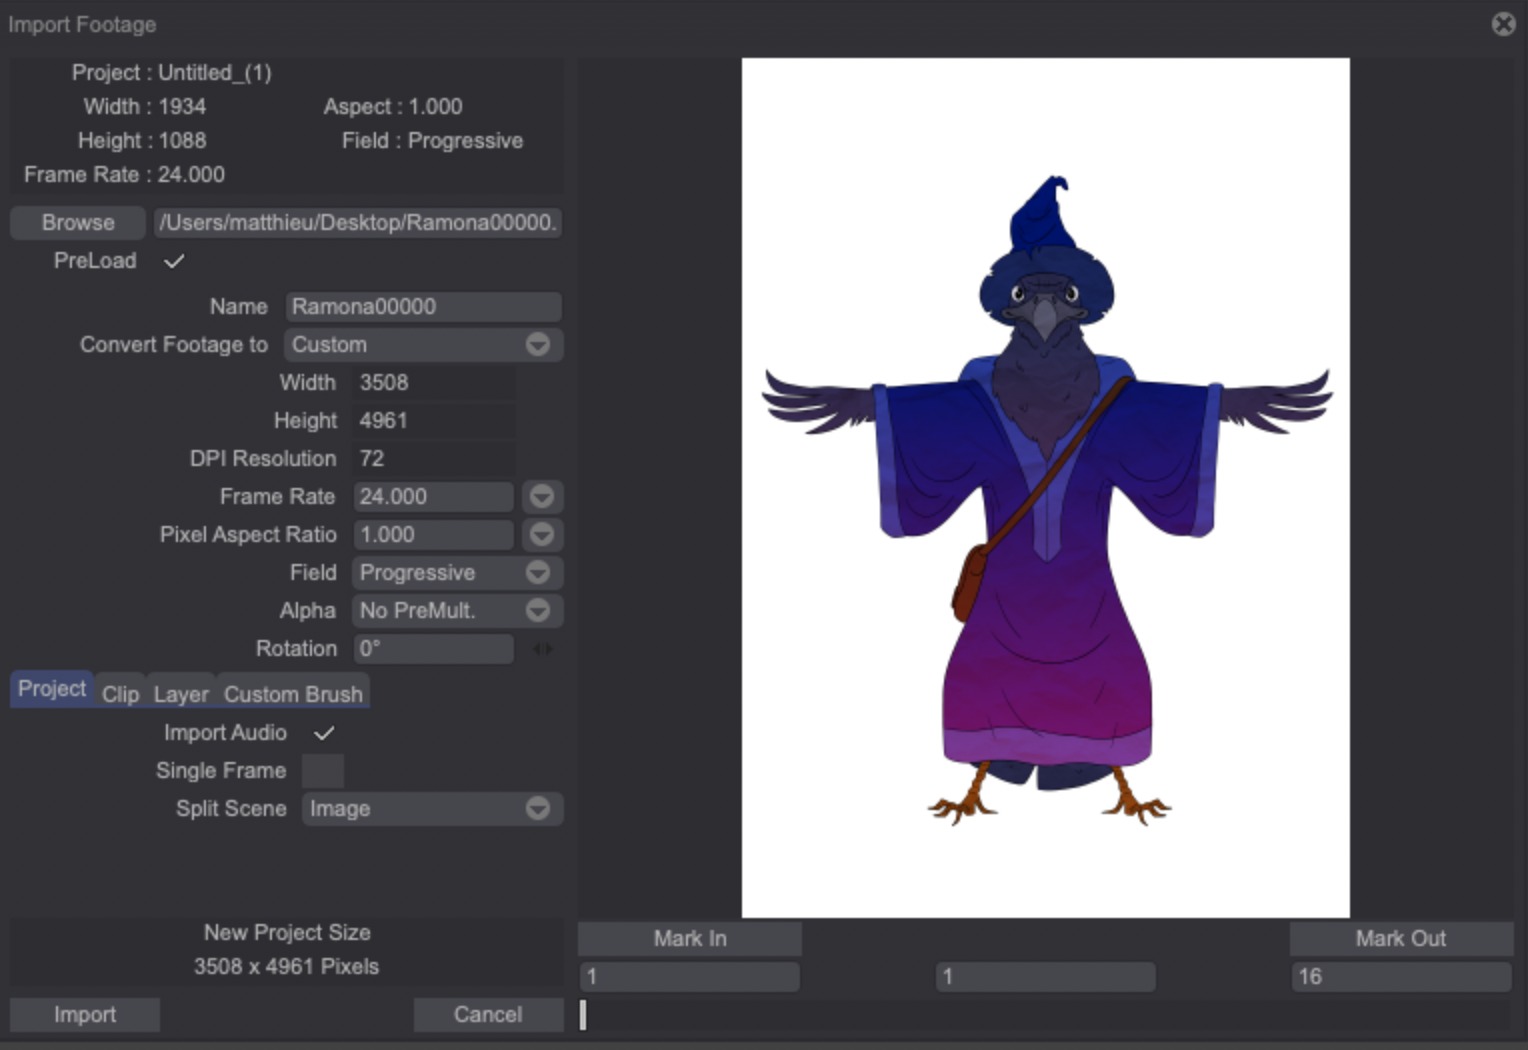
You may want to load an image, video or animation which has not been saved in .tvpp format. You can do so by accessing the the "File > Open / Import" menu (or hitting the [Shift + L] shortcut) to open the Import Footage Panel:
This Panel is similar to the Modify Project Panel.
Let's say you have loaded a video file (AVI or MOV):
- On the top-left corner of the Import Footage Panel you will find information relative to the file you have selected from your file explorer (its Size, Frame Rate, Aspect Ratio, etc.).
- These are followed by a text field showing the path and name of the file you have chosen.
- The Browse button allows you to choose a different file.
- The Preload button will be discussed in the Dependencies section of this lesson.
Your video file may be modified when imported to suit your needs: the Project's *Name, Width, Height, Frame Rate, Aspect Ratio, Field, Rotation may all be modified, as we have already seen in the previous section.
The Alpha popup menu, however, has specific options including: Guess, Premultiply, No Premultiply, Without Alpha and Alpha Only.
- The Guess setting will consider that the alpha value is equal to the maximum RGBA values present in the sequence.
- Premultiply refers to the method of calculating each pixel. In this case, each pixel is multiplied by its alpha value which results these pixels being calculated faster than with the No Premultiply option selected.
- The No alpha mode will load your sequence without transparency if it had any beforehand.
- Finally, the Alpha Only setting will only load a mask of the sequence. This mask will be extracted from the alpha layer of the sequence.
Further down, three tabs allow you to choose how the video should be imported: either as a new Project, a new Layer in the Current Project or as a Custom Brush (these three options are mutually exclusive).
When a video is loaded as a new Project, three options are available:

- The video sample loaded will be that located between the two time markers on the right side of the Panel. You may also choose to include sound with your video by checking the Import Audio box in the Import Footage Panel.
- The *Single Frame checkbox, if checked, will create a Project with a Layer and a single frame (the frame selected on the right side of the Import Footage Panel).
When a video is loaded as a new Layer or a new Clip, a new set of options similar to those encountered in the Modify Project section becomes available. You may:
- Stretch your video file to fit the dimensions of your current Project,
- Adapt the aspect of your video to that of the current Project,
- Compensate for any possible frame rate differences between your current Project and your video by stretching or contracting your video,
- Choose to stretch or contract with or without Time Interpolation,
- Create a Layer with a Single Frame (here again, a single frame or large sample may be imported between the Mark In and Mark Out points).
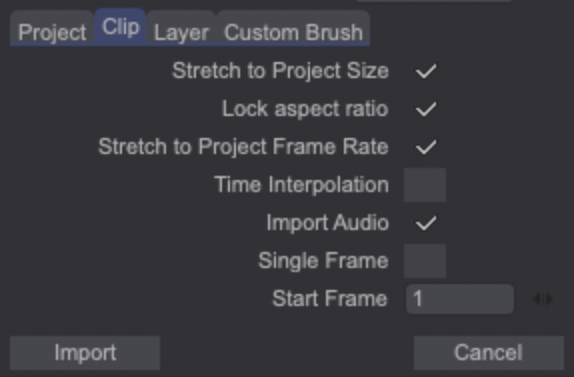
When a video is loaded as a Custom Brush, the same options are available with the exception of the Stretch to Project Size option.
When you load a file in PSD format, a new Project is automatically created (no import footage panel is opened) and the image's layers are all present in the Timeline.
You can easily retrieve the files you’ve recently imported or exported in order to load them again. To do so, simply click on the File > Recent files menu. From there, you’ll be able to go through your recently Imported and Exported files. Note that these options will only appear if files have been loaded or exported in the first place.