Roles and Timesheet symbols
Roles allow you to attribute specific statuses to frames. Adding a Role to a frame is easy. You can either:
- Right-click on the chosen frame on the Timeline, select the Roles item and choose the Role you want to apply to this frame.
- Right-click on the Timesheet’s cell corresponding to the frame you want to assign a Role to and select the Role you want to apply.
- Select the Timesheet’s cell corresponding to the frame you want to assign a Role to and use the Timesheet’s Role menu to do so:
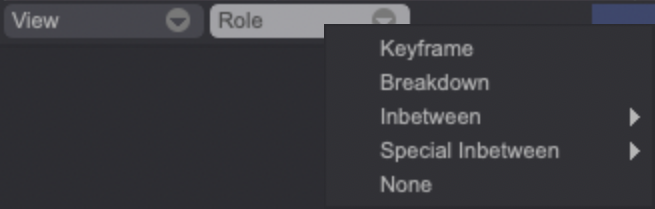
Roles can also be applied to multiple frames at once from the Timeline, except for Keyframes, which have to be named.
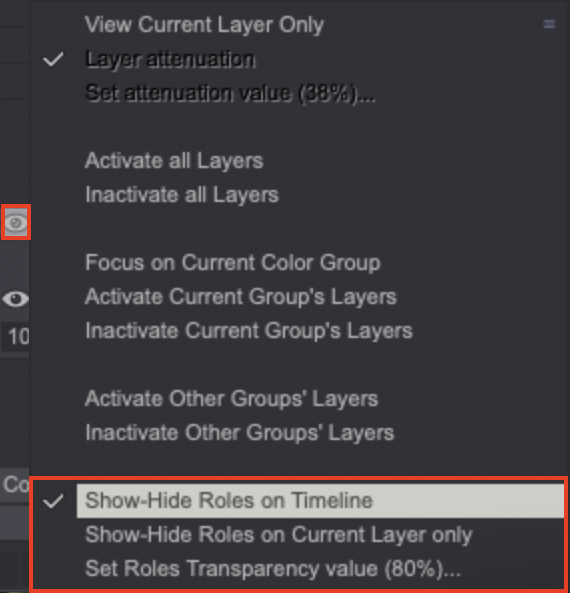
Each Role is associated to a specific symbol which is displayed on the Timeline and on the Timesheet. Those symbols can have their opacity set on the Timeline or can be hidden altogether by clicking on the Display Icon on top of the Layer Stack menu:
Here is a brief explanation on Roles and their symbols:
- Keyframes: adding this Role to a frame requires you to name that frame. Since the symbol for Keyframes is a circle with the frame’s name within it, make sure to use a short name such as a number when naming those frames. If you add a new Keyframe Role to a frame and name it the same way than an existing Keyframe, the existing Keyframe content will be copied over to the new Keyframe.
- Breakdown: depicted by a triangle shape.
- Inbetween (To Do / Done): regular inbetween, depicted by a small black dot. You can set the Inbetween to a To Do or Done status, allowing you to track your work’s progress. Done inbetweens are taken into account by the CELL column whereas To Do ones are not.
- Special inbetween (To Do / Done): specific inbetween relating to Japanese industry needs. Depicted by a bigger, transparent circle. You can set the Inbetween to a To Do or Done status, allowing you to track your work’s progress. Done inbetweens are taken into account by the CELL column whereas To Do ones are not.
- None: Image with no specific role, depicted by a transparent square symbol.
Additional symbols can be seen in the Timesheet panel:
- Empty images: depicted by a cross symbol.
- Exposures: depicted by a straight-line symbol.
A Roles and their associated symbols are also described in the Help Panel of the Timesheet, which can be opened by clicking on the "?" button:

Roles which can be attributed are also available as Light Table Modes and as Flip Checkpoints, which can be useful if you prefer using those instead of Image Marks.
We have also added a way to automatically apply the Image Mark of your choice to a frame when giving it a specific Role. You can set this by right-clicking on a Timeline’s frame and accessing the Roles > Map Image Marks item:
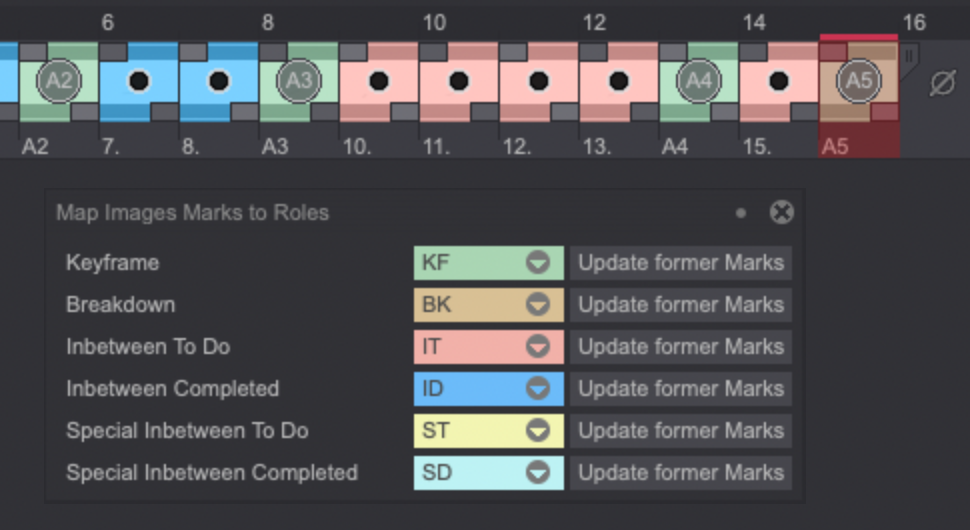
Clicking on the Update former Marks button replaces any existing Image Mark for frames of the same Role with the one you have chosen.
Relationship between Roles and the Cell column (Japanese layout only)
The CELL column is automatically updated when frames’ Roles change. In that regard, Inbetweens are taken into account by the CELL column when they are given the Done substatus. Doing this is the only way for an Inbetween to be considered by the CELL column as a final frame to be used in the project (and thus, numbered along other frames):