Timeline
The Preferences > Timeline tab is divided into multiple sections which we'll review below:
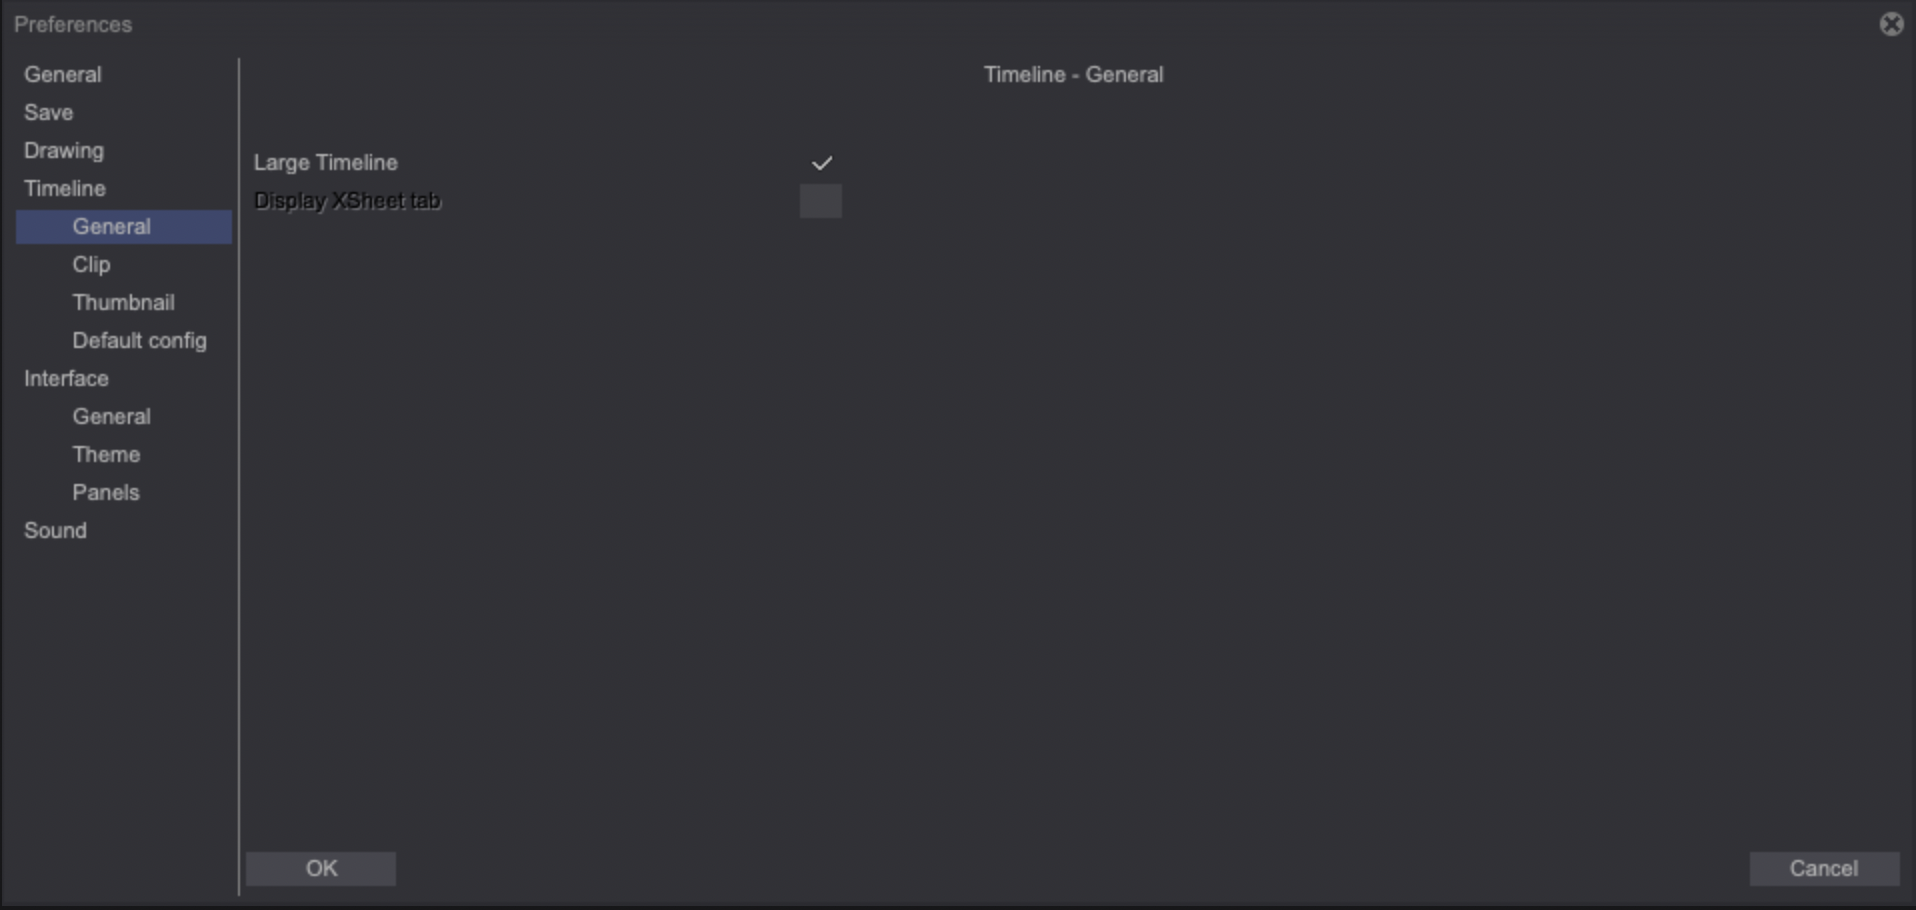
General tab
This tab has two parameters:
- When active, the Large Timeline option extends the Timeline so it takes the entire lower part of TVPaint's interface. When inactive, the Timeline takes less space: the Drawers will then take more space instead.
This setting only changes the Timeline's beahvior when its docked and won't have any effect otherwise.
- The Display XSheet tab checkbox will allow you to access TVPaint's XSheet through the addition of a third tab located at the top left of the Timeline (next to the Project and Clip tabs).
This option can't be turned on when using TVPaint 12.0, since the XSheet is being completely reworked for a later update.
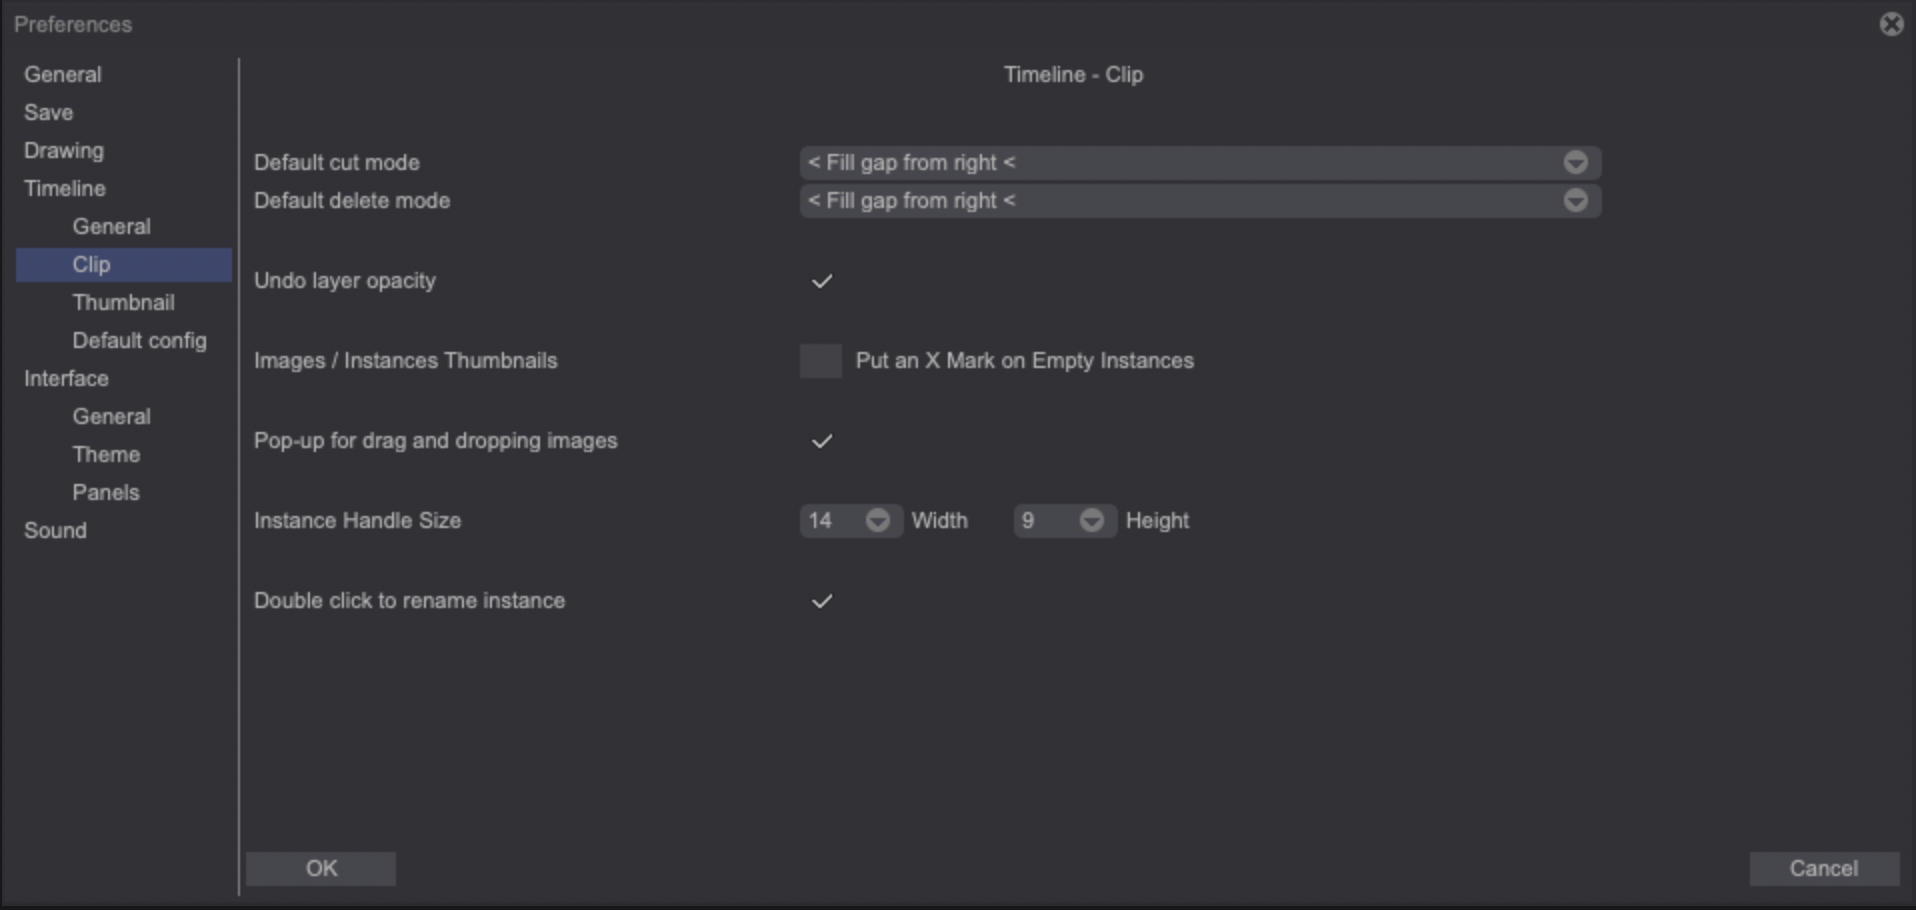
Clip tab
-
The Default cut mode and Default delete mode drop down menus allow you to change the software’s behaviour when cutting or deleting instances respectively. The effect of the available options have been reviewed in this section of the user manual.
-
Activating the Undo Layer Opacity checkbox will allow for changes made to layers' opacity to be undoable.
-
It is possible to make empty Images and Instances thumbnails stand out more on the Timeline by checking the Put an X Mark on Empty Instances box.
-
The Pop-up for drag and dropping images parameter sets the software's behavior when drag and dropping images in the Timeline. If checked, a pop-up will appear when drag and dropping images and you will be able to choose between Mov(ing), Copy(ing) and Insert(ing) the images. If unchecked, you will need to hold the ["Ctrl"] key to copy images and the ["Shift"] key to insert them. If no key is hold, images will be moved.
-
The default size of Instances' handles can be changed through the Instance Handle Size setting. You will be able to change their Width and Height.
-
Turn the Double click to rename instance checkbox if you want to be able to quickly rename instances through a double-click.
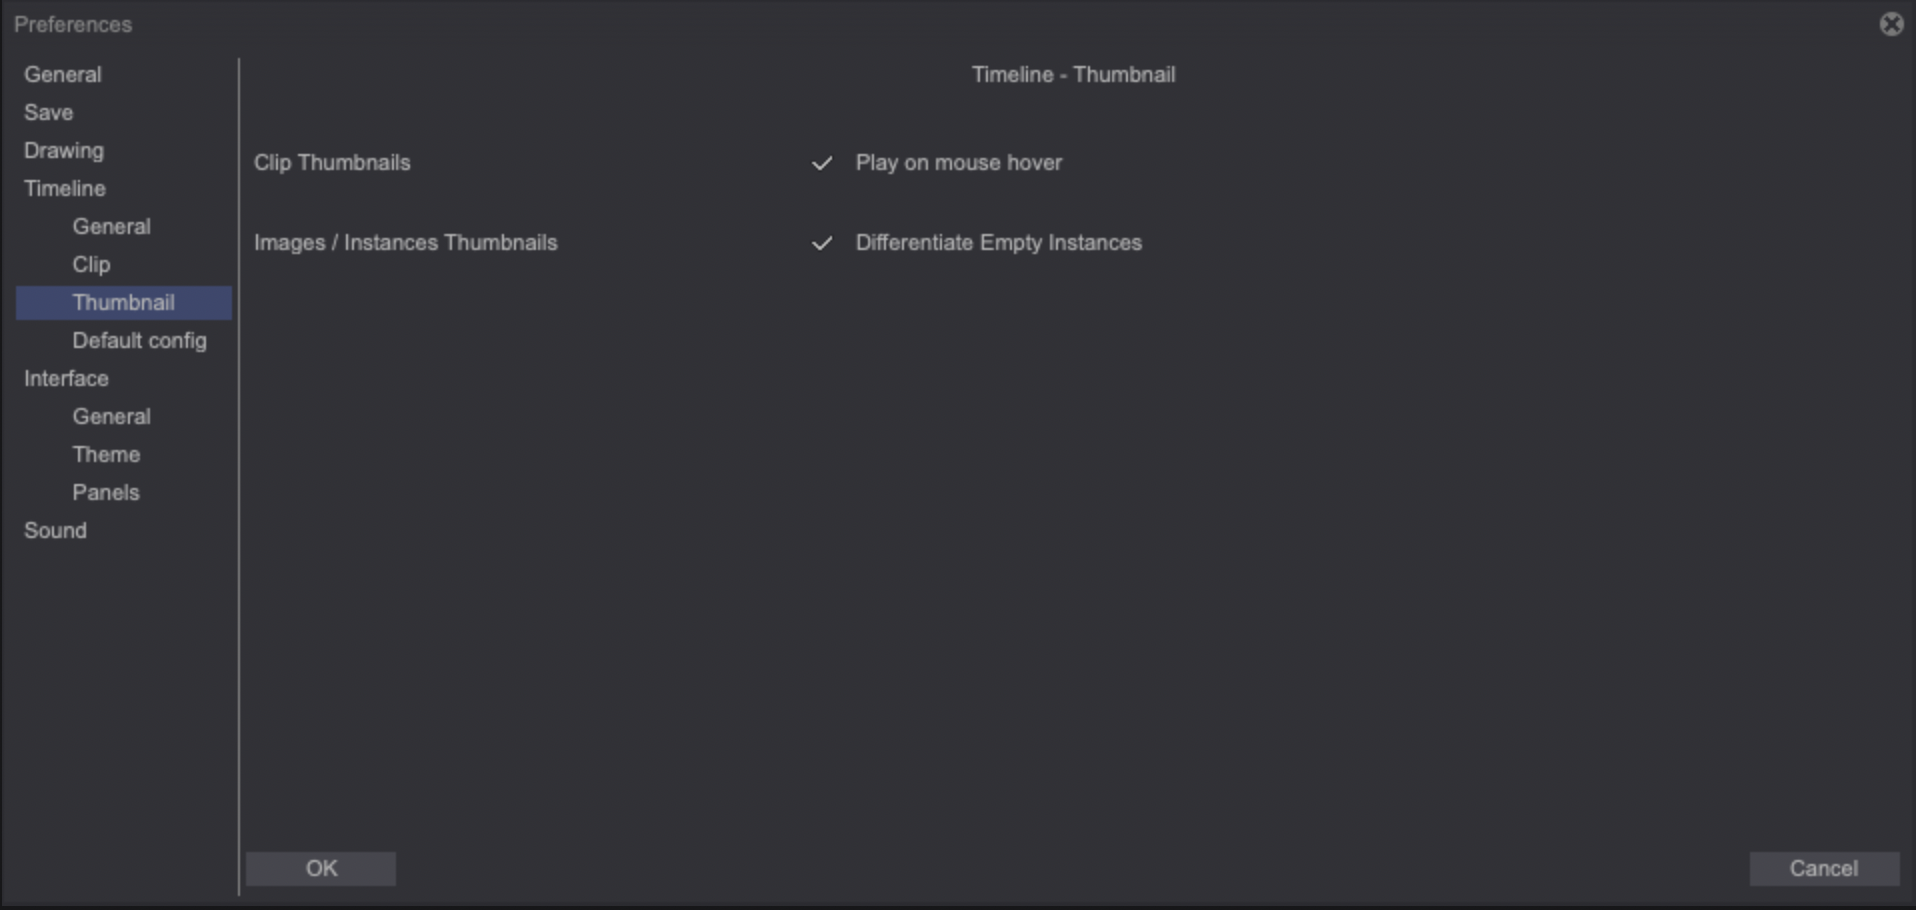
Thumbnail tab
-
The Clip Thumbnails > Play on mouse hover option, when checked, will allow you to play Clips when hovering over their thumbnail in Project View.
-
Apply a checkers pattern to layers’ empty instances thumbnails (so you can quickly spot them) by turning the Differentiate Empty Instances option on.
Default config tab
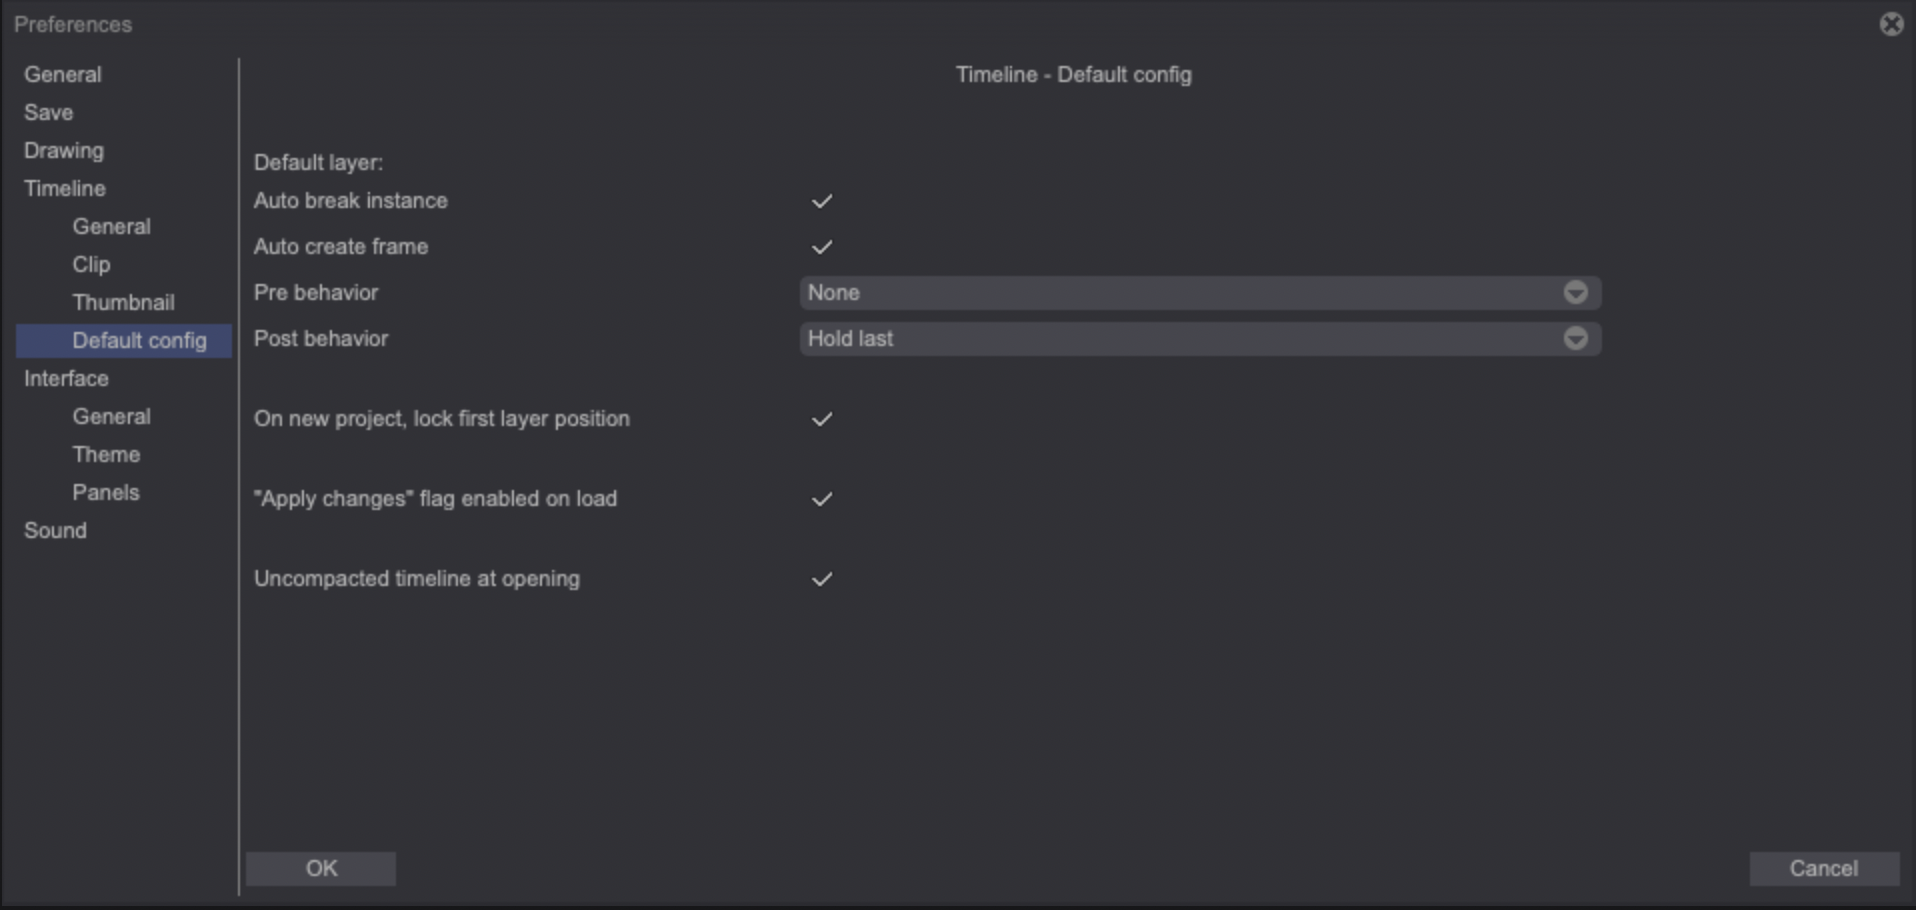
- The Default Layer allows you to set your preferences for the first layer that will be created by TVPaint when setting up a new Project:
- When checked, the Auto break instance setting will turn Auto Break on for the default layer.
- Check the Auto create frame so that the default layer has Auto Frame Creation on.
- You can choose the default layer's Pre and Post Behaviors through the dedicated drop down menus.
-
You can choose to automatically Lock (the) first layer's position on a new project.
-
Turn the Apply changes flag enabled on load option on to load the color changes caused by CTG Layers upon a project's load. Turning this option off will make your projects open faster but you will then have to use the Apply Changes button on your CTG Layers to apply the colorization to your layers.
-
When on, the Uncompacted timeline at opening option will make the Timeline appear at a regular zoom level, regardless of the previously set zoom level.