Cut, select and crop
The Cut, Select and Crop tools can be selected by clicking on their respective icons in the Main Panel:
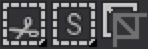
Cutting tools
Click on the ![]() icon to select a Cutting Tool which will allow you to cut a part of your drawing.
icon to select a Cutting Tool which will allow you to cut a part of your drawing.
Several tools are available through a right-click or a click-and-hold on this icon:

- The default, Rectangle Cutting Tool, allows you to cut by performing a rectangle-shaped selection.
- The Polygon Cutting Tool, allows you to cut by performing a polygon-shaped selection.
- The FreeHand cutting Tool, allows you to cut by performing a freehand selection.
- The Magic Wand Cutting Tool, allows you to cut by way of an automatic, color-based, selection.
The part that as been cut will automatically turn into a Custom Brush. You will then be able to:
- Paste the part that you just cut elsewhere on your Canvas.
- Fine-tune this Custom Brush to your liking to create a unique brush.
When you select a Cutting Tool, the Tool Panel will display the selected Cutting Tool's settings. The Rectangle, Polygon, and FreeHand Cutting Tools all share the same parameters:
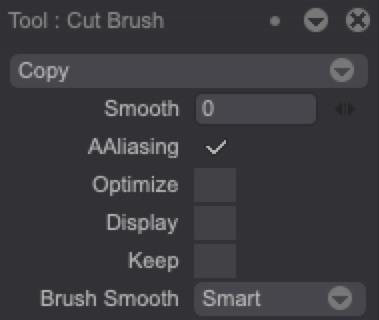
- The first drop-down menu lets you choose between the Copy and Cut modes. When Copy is selected, a copy of your selection is made and your original drawing is left untouched. Selecting the Cut mode will erase the selected part of your original after the cut has been performed.
- The Smooth level allows you to apply feathered edges to the result.
- The AAliasing checkbox lets you automatically apply antialiasing when the brush cut is performed.
- Check the Optimize checkbox to remove as many transparent pixels as possible around the cut brush.
- Turn the Display setting on to perform a cut on what is currently displayed on the canvas. This means the cut will be done on several layers instead of the current one only.
- Check the Keep option to keep your previous Custom Brush settings and apply them to the cut to be performed. The brush settings will be set to their default values if this option is not enabled.
- The Brush Smooth drop down menu lets you choose the anti-aliasing algorithm to be set for the to-be-created Custom Brush.
The Magic Wand Cutting Tool has a few additional settings:
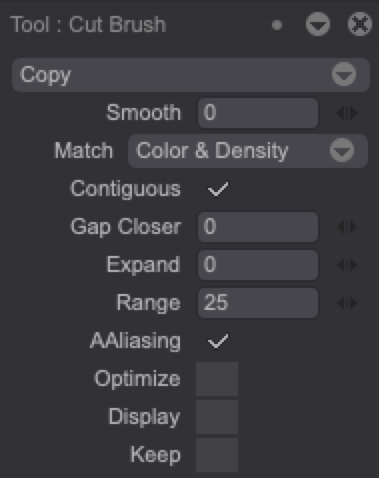
- The Match drop down menu allows you to fine-tune the color selection to be made.
- The Contiguous checkbox allows you to select continguous pixels only (checked) or all pixels sharing the same color information on the canvas (unchecked).
- Raise the Gap Closer level to allow some noncontiguous pixels to be selected if they share the same color information.
- Raising the Expand level will extend your selection area to pixels surrounding the matching pixels.
- Setting the Range level to a higher number will allow for more colors into the selection.
Selection tools
Click on the ![]() icon to choose a Selection Tool:
icon to choose a Selection Tool:
Several tools are available through a right-click or a click-and-hold on this icon:
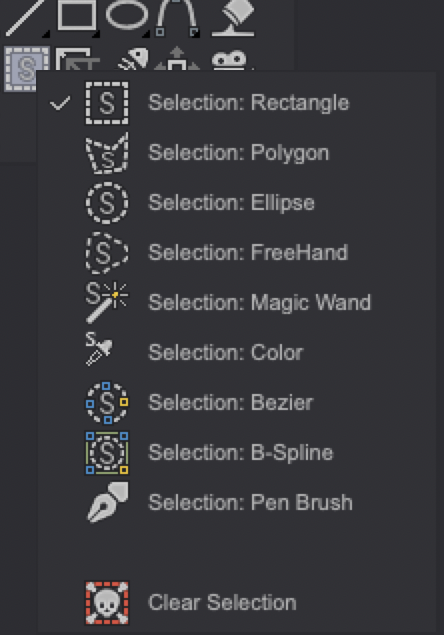
Some of the selection shapes available are the same than the Cutting Tools' (Rectangle, Polygon, FreeHand, MagicWand), but you will also be able to:
- Perform Ellipse-shaped selections.
- Perform Color-based selections.
- Perform Bézier and B-Splines selections.
- Use a Pen Brush tool to perform a selection by drawing it on your Canvas.
- Clear the current selection.
The Tool Panel will display the chosen Selection Tool's settings. Most of those parameters are identical to the Cutting Tools ones:
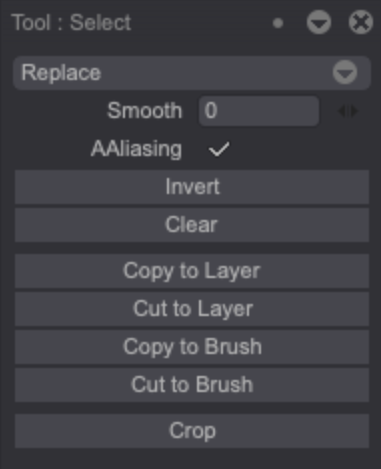
- Three selection modes are available: choose the Replace mode to replace your old selection with a new one, choose the Add mode to add the new selected area to the current selection, choose the Sub mode to substract the new selected area from the current selection.
- You can choose to Invert and Clear the current selection.
- You can also Copy or Cut your selection to a new Layer, to a Custom Brush or Crop it and create a new project out of it.
The Crop Tool
Click on the ![]() icon to select the Crop Tool.
This tool will allow you to create a new project from the cropping area that you will have defined.
The new project will also contain the former project's layers and images being affected by the crop.
icon to select the Crop Tool.
This tool will allow you to create a new project from the cropping area that you will have defined.
The new project will also contain the former project's layers and images being affected by the crop.
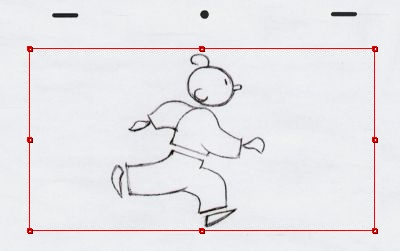
The cropping area can be directly set on the canvas, using the on-screen HUD (which allows you to move, resize, and rotate it):
You can also shape the cropping area from the Tool Panel's settings:
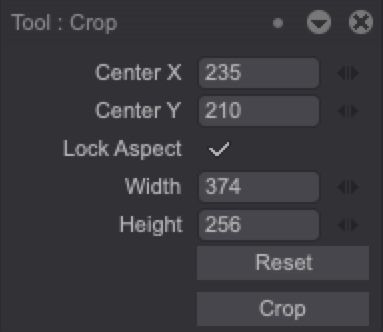
- The Center X and Center Y fields relate the the coordinates of the top left-hand corner of the cropping area.
- You can set the Width and Height of the cropping area.
- Turn the Lock Aspect option to keep the current width/height ratio.
- You can Reset the cropping area.
- Perform the Crop by clicking on the related button or by pressing the "Enter" key.
Here is an example of a cropped project: